Hi Pete
I have fixed several of the HVAC head for the problem you're having, follow this and reflow the solder joints as below
Being surface mounted, chips just use a bit of new solder to reflow the old solder
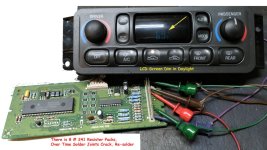
There is a common failure point for all C5 HVAC controller head in where the LCD screen the output goes dim and in sunlight cannot even be seen
to make adjustments for what you want in HVAC
Replacement HVAC units today costs as much as $600 plus yours as a core but since GM quit using these are harder to find these for sale
Some vendors do have a repair service where you have to mail them the unit and then have the downtime to get the unit back to them
Many charge $75 plus and the cost of round trip shipping
This could take from 1-2 weeks
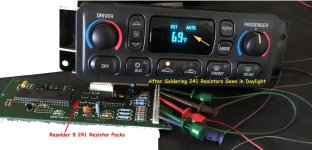
Here is an example of fixing this command failure point :
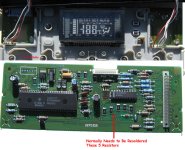
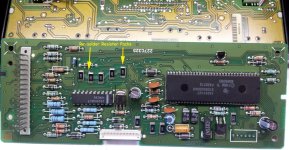
There are eight resistor packs, on top they say "241"
Over time due to heat the soldering joints from them crack causing lower voltage to the LCD screen
Take the HVAC unit out of the console, there is only 1 small mounting screen at each end.
Disconnect the wiring harness from the unit
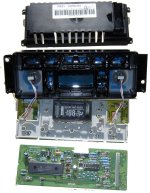
Remove 4 small screws on the back side to crack open the rear and front cases.
Lift up the rear daughter board out of that back case
Turn over and look for eight resisters packs labeled 241
Use a low wattage soldering iron with thin solder
Re-solder both ends of each of the 8 resister packs, do not overheat them
Best is re-solder just one end of each and then let them cool a few minutes and then re solder the other ends
So that is 16 solder joint ends
While the unit is open lift the front daughter board by removing 4 small screws (1 per corner) and there is several LED as lights and the LCD screen and the lens for it and clean them
Reverse the process in putting the HVAC unit back together and then reinstall back into the console
Before installing center console, turn Ign key to ACC and assure LCD now reads clearly
Cost is zero if you have small soldering iron and thin roll of solder, otherwise maybe spent $25 for them and use for other projects
Here is before and after re-soldering was done
NOTE :
To show this, I traced what each wiring pin was for and then temporarily hooked up voltages and ground to make the LCD screen viewable
Not something you need to do
