You are using an out of date browser. It may not display this or other websites correctly.
You should upgrade or use an alternative browser.
You should upgrade or use an alternative browser.
C3 Race Car Build
- Thread starter Oneball
- Start date
Oneball
CCCUK Member
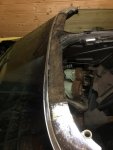
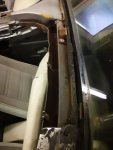
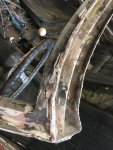
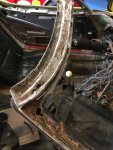
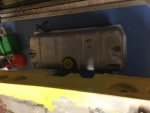
The scrap man said as it was mainly fibreglass and filler it wasn’t worth much. 
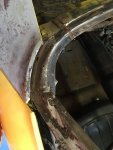
I reckon it’d have taken someone longer to put the filler in the screen frame than it would to weld it up. You really couldn’t tell it wasn’t metal.
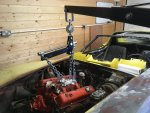
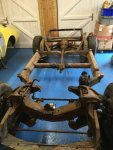
I figured as it’s going to be a race car I’d get some practice at engine in/out while the bodywork doesn’t matter plus it means I’ve not got to lift the body as high.
Oneball
CCCUK Member
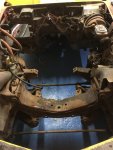
Steering column is out, someone’s cross threaded the steering wheel but so the inner may be scrap. Brake lines to master cylinder disconnected, earths and seatbelt anchor undone and all the body body bolts except the rearmost two removed without any trouble. Last two to come out and then the body will come off.
johng
CCCUK Member
Thought you might like to check my list of things to remove in case you missed anything.
| Remove: | ||||||||
| From Front | ||||||||
| Mechanical | ||||||||
| Front bumper and frame reinforcements | ||||||||
| Unbolt nose support from frame (will stay with body) ?? | ||||||||
| throttle cable (at carb) | ||||||||
| steering rag joint also remove column?? | column removed | |||||||
| brake lines (at master cylinder) | ||||||||
| Radiator | ||||||||
| Radiator core support bolts, lower only - Remove | ||||||||
| A-Frame dust covers - Remove from under A-arm?? | ||||||||
| fuel lines | ||||||||
| Electrical | ||||||||
| Starter wires | 1 large, 1 small (on connection nearest engine block) | |||||||
| Ground straps (more than one place) | one on trans next to starter motor | |||||||
| oil pressure sensor (below distributor) | ||||||||
| Alternator wires | ||||||||
| small body earth strap at driver's side no.1 body mount | ||||||||
| horn | ||||||||
| Air con compressor clutch cable and earth | ||||||||
| water pump sensor (driver's side engine head) | ||||||||
| Speedo cable | ||||||||
| spark plug leads so they don't get caught | ||||||||
| distributor (2 plugs) | ||||||||
| body mount bolts | ||||||||
| brake balance switch (under master cylinder) | ||||||||
| Vacuum lines | ||||||||
| brake booster vacuum hose (intake manifold) | ||||||||
| headlight vacuum reservoir (3 pipes) | ||||||||
| carb vacuum connection | ||||||||
| fuel canister hose (above driver's side splash shield) could be up to 3 hoses | ||||||||
| Water hoses | ||||||||
| Heater and A/C hoses from motor | ||||||||
| water pump outlet to AC unit | ||||||||
| AC unit return to intake manifold | ||||||||
| From Center | ||||||||
| Parking brake cable and brackets from under seat area | there is a spring that goes from the adjustment rod to the crossmember | |||||||
| Shifter cable | ||||||||
| Battery ground strap from frame | ||||||||
| Rocker moldings | ||||||||
| Seat belt anchors, left, right and center - remove?? | ||||||||
| From Rear | ||||||||
| The rear bumper | ||||||||
| aerial earth/rear chassis earth (driver's side rear corner) | ||||||||
| Gas tank ground and sending unit wire |
Oneball
CCCUK Member
That’s great, did it go back on smoothly?
Still undecided, I was intending to shove it into a corner and forget about it for a while! It’s too bad to consider piecemeal repairs so the options are either replace the top and sides with new, which I think is £1000 for the parts or cut it off and go open but I don’t really like open race cars, you get wet!

I’m still pondering engine options too, although not the original it has got a period correct, 4 bolt main 350 which I could rebuild or I have to find a period correct big block.
Still undecided, I was intending to shove it into a corner and forget about it for a while! It’s too bad to consider piecemeal repairs so the options are either replace the top and sides with new, which I think is £1000 for the parts or cut it off and go open but I don’t really like open race cars, you get wet!

I’m still pondering engine options too, although not the original it has got a period correct, 4 bolt main 350 which I could rebuild or I have to find a period correct big block.
johng
CCCUK Member
Putting it back on was no problem, I had a couple of mates to check that nothing was catching and just lowered it slowly on the block and tackle. When it got close I put a couple of large screwdrivers through the holes in the sills into the frame and they guided it down nicely. Make sure that you free up the captive nuts on the frame first so that you can line them up with the bolts.
I like the look of that open top racer, might not be practical but it looks great.
I like the look of that open top racer, might not be practical but it looks great.
Oneball
CCCUK Member
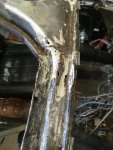
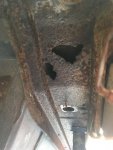
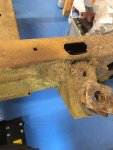
Most of the top of the chassis is now seam welded. Need to pick up some plate to make up a new rear left body mount this week, then I can turn the chassis over to do the underside.
I’ve decided to get it dipped and e coated so it’s booked in for that in January.
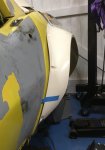
Had a little play with the flares tonight.
I’ve decided to get it dipped and e coated so it’s booked in for that in January.
Had a little play with the flares tonight.

Daytona Vette
Well-known user
Which flares are they - are you just going for the flares on the back? - some wide rubber needed there.


