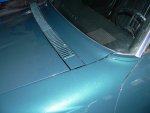
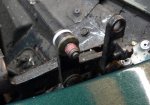
An update. Having studied the built in means of door adjustment, none seemed likely to cure my problem, so I decided to remove the door for a better assessment. The online advice on door removal always seemed to start with
"DO NOT TRY TO REMOVE THE DOOR ATTACHMENT SCREWS - THEY ARE LOCTITED IN AND WILL SHEAR AT THE SLIGHTEST PROVOCATION !!" ( usually written in letters of fire - or more probably, blood ). The alternative of removing the entire door actuation system was rendered unattractive by the fact that some previous owner had coated the whole wiper housing with a thick coat of underseal that had hardened to the consistency of fossilised pitch. So, nothing daunted, I decided to attempt extraction of the screws. Having prepared the ground with two days of liberal applications of Plus Gas, my tentative attempts at unscrewing were met with immediate success. This, it turned out, was both good news and bad news. The good news was that all four screws removed easily with minimal torque, the bad news was that, as our american friends would say, 'Bubba' had been there before me. He'd obviously removed the door in the past and had success with three screws but the fourth had sheared. This he'd decided to recover by drilling out the remains and re-tapping to accept a 1/4" NF screw. He'd obviously been unable to centre his drill over the remains of the sheared screw and it had wandered off line. So this new hole was out of position and the error was responsible for the misalignment of my door.
OK, I have three original screws plus Bubba's 'replacement' ( you can see why the originals shear so easily during removal, the actual thread is
10 -24 NC and the undercut at the shoulder is just 1/8" diameter! ).....
View attachment 7655
I decide to recover Bubba's bodge with an original screw and an appropriate thread insert, so buy 2 ( in case I lose one ) 10-24 NC's with an external thread of 5/16-18 NC.
View attachment 7656
New screws are usually available only as a set of 4 at 30 quid and long delivery, but Scott at CK comes up trumps with a second-hand one.
I don't have the fixturing necessary to correct the misplaced position of Bubba's hole, so instead of screwing in the insert I decide to make an oversized hole to accept it with enough clearance to set the position after the door is re-assembled and then bond it in.. My Dremel mills a large hole in roughly the right position......
View attachment 7659
I assemble the insert and new screw to the operating linkage...
View attachment 7666
.....hook the door over it and replace the other three screws ( Fitting these with the sausage fingers I have is a very fiddly job. I actually tied a length of cotton under the head of the screw in order to retrieve it if dropped during assembly - when it would disappear down the drainage ducts, never to be seen again

)
With the door reassembled I adjust the alignment for best panel fit, wedge the insert in position and bond it in place with epoxy putty......
View attachment 7667
I relax and give the epoxy an hour to cure.........
View attachment 7661
......before operating the door up and down.
Hooray! down position is now much improved.....
Before...
View attachment 7662
....and After
View attachment 7663
Perhaps not quite perfect ( but then, how many C3's are? ) but good enough. Just have to fill and touch up the paint on the epoxy and my 'Vette has one more improvement.

Now, when it stops raining, I've got a ( very heavy! ) spring to fit......
View attachment 7664


