What have YOU being doing or are you planning to do with your Vette?

Mad4slalom

Well-known user
My '71 has exhibited a clunk when changing gear ever since I bought it three years ago. There are obviously several possible sources of play in the drive train but one likely one is the differential front mount snubber. This comprises two rubber bushings that limit and damp the up and down motion of the front of the diff under driving loads.The snubber assembly is circled in this pic...
View attachment 14081
The active components are rubber and I doubt they've been changed in the cars 50 year life, so even if they're not the source of my problem they're almost certainly worth changing. A problem in this area is readily detectable on automatics but less so on manuals (like mine) where it is easier for the driver to minimise a clunk by careful feathering of the gearchange. I arm myself with an overhaul kit ( in rubber rather than polyurethane; this is one pair of bushes that are better having the greater compliance of rubber ).....
View attachment 14082


....hoist the car in the air on my trusty QuickJack....

View attachment 14083
......and squirm underneath. The diff area is a bit damp (that's a problem for another day) but I locate the snubber nut - arrowed red ....

View attachment 14084
.....and attempt removal. I need to get a 5/8" spanner on the bolt head to react the nut torque but the very limited access beats any of my spanners so I give a good haul on the nut anyway to see if anything comes loose. Nothing does so I revert to my impact wrench and eventually both nut and bolt break free and rotate. I cut the nut off with a grinder and extract the bolt upwards, rotating the propshaft by hand to optimise clearance. With the bolt out I need to prise the the diff mount bracket down to extract the lower bush. Unfortunately The ideal place to react a lever is right on top of a brake line - arrowed yellow, so I remove the securing clip - arrowed green, gently ease the brake line clear and with leverage applied with a robust tyre iron, winkle out the bush. The upper bush parts I extract through the small clearance between the bracket and the prop shaft.
View attachment 14085
Upper row is the old parts, lower the new ones

The lower bush is in reasonable condition but the upper - arrowed red, is toast - in two parts - so providing no restraint on upward movement of the diff nose. This seems to bear out the possibility of this being the source of the clunk. In forward gear the drive torque reaction applies a downward thrust to the front of the diff. During a gear change the torque is momentarily released and the diff nose will lift. The degraded upper bush provides no resistance - hence a clunk.

So, levering down the bracket again I squeeze the new lower rubber in place. Fitting the new upper is more of a problem. Try as I might I cannot find a way to squeeze the rubber fitted to it's metal 'top hat' bush through the gap between the frame bracket and the prop shaft. The bush and the 'top hat' will go through separately but his gives me the problem of how to reassemble them in a blind space with very limited finger access, not helped by the rubber being a tight fit on the 'top hat'.
There is actually a large clearance between the mounting bolt and the top hat and rubbers, so I drill a small hole in the end of the bolt and after fitting the top washer, attach a length of cable. I lube the bore of the top rubber and the shank of the top hat with silicone grease and slide them over the cable (still assembled together in this shot)......

View attachment 14086
With the free end of the cable fed down and through the lower bush and bracket, I pull the parts into position and as the end of the bolt appears through the bracket, a tug on the cable slides the top hat into the bush....

View attachment 14087
The cable removed, I can get my finger on the head of the bolt enough to prevent rotation while I fit the large clamp washer (I re-used the original - arrowed yellow in the row of parts - as it's far more robust than the replacement), spring washer and nut. With the nut screwed up above the hole in the bolt I can stick an appropriate rod ( in this case an Allen key).....
View attachment 14088
...... to hold the bolt while I tighten the nut. Just need to ease the brake line back into position and replace the clamp - et voila - job done!

View attachment 14089

Down off the QuickJack and off for a test drive. Immediate improvement! Gear changes - even relatively clumsy ones - are now clunk free and even a judder when letting out the clutch from stationary ( that I'd mentally attributed to a misaligned clutch) is reduced.

The whole process was a bit of a pain - more than it should have been according to the clever-cuts on the internet - but it's turned out to be one of the more rewarding jobs I've done so far. :)
Great tutorial, will check for my clunk👍
 

antijam

CCCUK Member
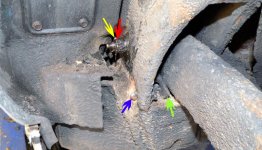
Prior to replacing my crusty old trailing arms I take a break from stuffing myself with mince pies, hoist the car up on the QuickJack, scrub away enough combined mud and underseal to expose the pivot bolt and nut and give them a generous dose of PlusGas in the pious hope that this will allow removal without the need to saw through the bolts. The internet is full of horror stories about having to saw through both sides of the bolts since these have become bonded by rust to the trailing arm bush metal sleeve. I'm hoping that repeated doses of PlusGas over the next few days will penetrate far enough to free them up.

The driver's side attachment looks original.....

LH.jpg

....with the split pin (arrowed yellow) inserted through the castellated nut (red) and the tails of the shims (green) (that since my car is a '71, I hope are slotted for easy removal) and the long split pin (blue) securing them, visible.

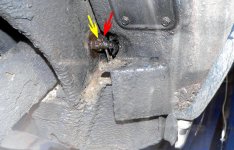
The passenger side is a different story........

RH.jpg

There are no shims or securing split pin present and the pivot bolt nut has been tightened up so far that the split pin hole is well beyond the nut castellation. This will obviously have deformed the chassis member as well as producing a totally random degree of rear toe-in.

Looks like I'm going to have some fun sorting this out! :(
 

Jimbo64

CCCUK Member
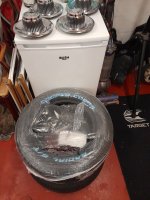
Firstly, need to remove front passenger wheel and replace tyre, (new one ready & waiting - see image below) after tracking/castor camber now all correctly set up. I did get full refund from garage, so that was something.
Secondly, I'm awaiting confirmation from Gavin at EMC that my new exhaust system has arrived, so I can fit it for a nice new 2022 soundtrack. 20211116_120505.jpg
 

Forrest Gump

CCCUK regional rep
The passenger side is a different story........


There are no shims or securing split pin present and the pivot bolt nut has been tightened up so far that the split pin hole is well beyond the nut castellation. This will obviously have deformed the chassis member as well as producing a totally random degree of rear toe-in.

Looks like I'm going to have some fun sorting this out! :(
It is amazing what you find. Some people really should not be let loose with a set of spanners!
 

Oneball

CCCUK Member
Prior to replacing my crusty old trailing arms I take a break from stuffing myself with mince pies, hoist the car up on the QuickJack, scrub away enough combined mud and underseal to expose the pivot bolt and nut and give them a generous dose of PlusGas in the pious hope that this will allow removal without the need to saw through the bolts. The internet is full of horror stories about having to saw through both sides of the bolts since these have become bonded by rust to the trailing arm bush metal sleeve. I'm hoping that repeated doses of PlusGas over the next few days will penetrate far enough to free them up.

The driver's side attachment looks original.....

View attachment 14750

....with the split pin (arrowed yellow) inserted through the castellated nut (red) and the tails of the shims (green) (that since my car is a '71, I hope are slotted for easy removal) and the long split pin (blue) securing them, visible.

The passenger side is a different story........

View attachment 14751

There are no shims or securing split pin present and the pivot bolt nut has been tightened up so far that the split pin hole is well beyond the nut castellation. This will obviously have deformed the chassis member as well as producing a totally random degree of rear toe-in.

Looks like I'm going to have some fun sorting this out! :(
Spray some plus gas where the bushes are too. Fingers crossed. I had to cut mine even with the body off.
 

fine69

Busy user
Welcome, looks like you’ve got a couple of nice cars.
Where’s the adjuster on the front shocks, always seems to be the tricky one to accommodate?
Hi Oneball. Thanks yes both the Camaro and Vette are pro touring cars. vette has forged 383/TKO600RR and a million suspension mods. Camaro has small block 427/TKO600/9" Ford/Wilwoods etc.

The adjusters are on the inside, they're not the easiest to get to but it's doable even with the vette being so low. I've got a front VBP monospring which confuses things a bit. The rear shocks are on, just got to order some smaller washers for the monospring as the washers hit the shocks. I will provide more info when I install them shortly.

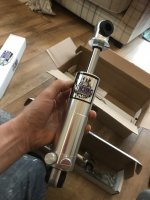
The shocks are great quality and good value, I've been meaning to get them for years, being able to adjust the compression is great on such a low car.
 

Attachments

  • vette and camaro2.png
    vette and camaro2.png
    1 MB · Views: 14
Last edited:

Roscobbc

Moderator
Hi Oneball. Thanks yes both the Camaro and Vette are pro touring cars. vette has forged 383/TKO600RR and a million suspension mods. Camaro has small block 427/TKO600/9" Ford/Wilwoods etc.

The adjusters are on the inside, they're not the easiest to get to but it's doable even with the vette being so low. I've got a front VBP monospring which confuses things a bit. The rear shocks are on, just got to order some smaller washers for the monosopring as the washers hit the shocks. I will provide more info when I install them shortly.

The shocks are great quality and good value, I've been meaning to get them for years, being able to adjust the compression is great on such a low car.
Thats Aaron - late of Kent?
 

Chuffer

CCCUK Member
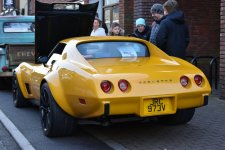
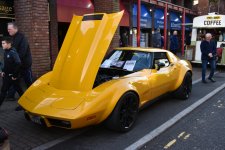
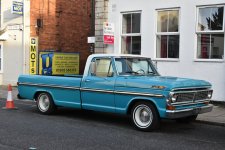
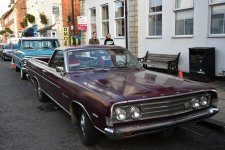
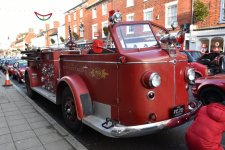
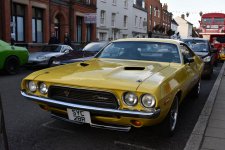
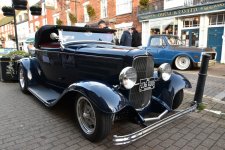
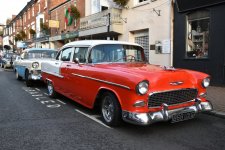
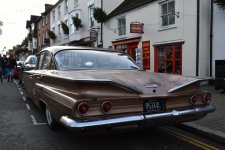
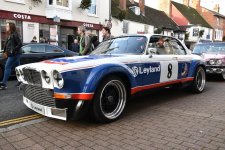
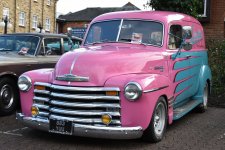
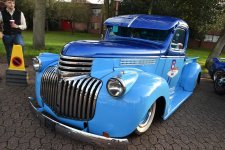
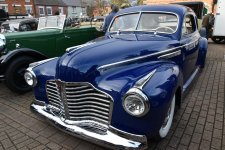
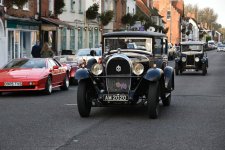
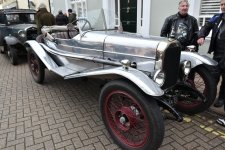
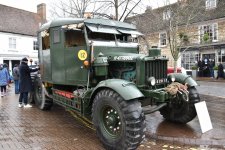
Happy New Year to all you guys and gals out there , hope you you all had a fab Christmas . Just got back from the renowned New Years Day `Stoney Classic` gathering at Stoney Stratford in Buckingamshire . The un seasonably mild weather brought a huge turn out of cars from very rare vintage and classics , to Yanks , moderns , bikes and military . Only one other Corvette there that was heavily modded with LS1 engine and running gear . It was for sale by a dealer at an incredibly optomistic £39, 500 .00 !!!!
DSC_0463.JPGDSC_0464.JPGDSC_0447.JPGDSC_0450.JPGDSC_0451.JPGDSC_0453.JPGDSC_0455.JPG
 

Chuffer

CCCUK Member
And some more .:)DSC_0456.JPGDSC_0457.JPGDSC_0461.JPGDSC_0465.JPGDSC_0467.JPGDSC_0468.JPGDSC_0473.JPGDSC_0449.JPGDSC_0474.JPGDSC_0477.JPG
The challenger looks nice
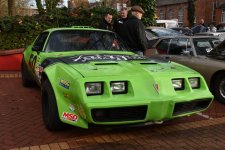
Yeah , and love the Lime Green Pontiac that belongs to Nathan of Paragon Autos . He did work on my C3 when I first bought it so it was good to catch up with him again for a chat . I also love the blue 1940`s era Buick Super Eight Special , a stunning piece of classic Americana .
 

Mad4slalom

Well-known user
Happy New Year to all you guys and gals out there , hope you you all had a fab Christmas . Just got back from the renowned New Years Day `Stoney Classic` gathering at Stoney Stratford in Buckingamshire . The un seasonably mild weather brought a huge turn out of cars from very rare vintage and classics , to Yanks , moderns , bikes and military . Only one other Corvette there that was heavily modded with LS1 engine and running gear . It was for sale by a dealer at an incredibly optomistic £39, 500 .00 !!!!
View attachment 14840View attachment 14841View attachment 14842View attachment 14843View attachment 14844View attachment 14845View attachment 14846
What a great day out and start to the year. Great concept having a show in the middle of town! Much better than being stuck in a muddy or dusty static field, I bet the town was buzzing all day and a constant stream of different cars to look at together with all the normal food and coffee shops so you have more choice than the often one and only catering van on a site. Worth a trip next year, I remember driving up to claremont’s new years day open house meets for mince pies etc back in the day, all the way from cornwall , I must have been keen as I didnt even have a vette then 😂
 

Forrest Gump

CCCUK regional rep
The yellow ‘76 is an interesting car. Looking at pictures on eBay shows this car is a C3 body on a customised C5 chassis, so as well as the LS motor it has C5 suspension, drivetrain rear mounted C5 gearbox etc. C6 brakes.
 

Chuffer

CCCUK Member
What a great day out and start to the year. Great concept having a show in the middle of town! Much better than being stuck in a muddy or dusty static field, I bet the town was buzzing all day and a constant stream of different cars to look at together with all the normal food and coffee shops so you have more choice than the often one and only catering van on a site. Worth a trip next year, I remember driving up to claremont’s new years day open house meets for mince pies etc back in the day, all the way from cornwall , I must have been keen as I didnt even have a vette then 😂
Absolutely ! It has built up a big reputation over the past few years and they run a summer time event too . The middle of town is completely given over to it and attracts a lot of Joe Public too . It is all run for charity supporting Willen Hospice in Milton Keynes and has a great `street vibe ` atmosphere . All the cafes and pubs were open and a few shops too dispite being a bank holiday . Starts at 10am and runs until 2pm . As you say , a constant stream of cars and bikes coming and going throughout and the volunteer marshalls do a fantastic job .
 

Chuffer

CCCUK Member
The yellow ‘76 is an interesting car. Looking at pictures on eBay shows this car is a C3 body on a customised C5 chassis, so as well as the LS motor it has C5 suspension, drivetrain rear mounted C5 gearbox etc. C6 brakes.
But is it £39, 500 `s worth of interesting ? :unsure:
 

Forrest Gump

CCCUK regional rep
But is it £39, 500 `s worth of interesting ? :unsure:
If you commissioned that car to be professionally built what’s it going to add up to? Huge amount of labour, a lot of expensive parts, paint job and a profit margin. You could on the other hand get a nice C3 AND a decent C5 for the same dosh.
 
Top