antijam
CCCUK Member
Finally got the bolt stub extracted - without having to resort to heat.
View attachment 15212
The frame on my '71 is liberally coated in ancient underseal (would this have been original - did chevy underseal early C3's? ) and I was chary about using a torch in case it decided to go out in a blaze of glory. Underseal is always a bit of a two-edged sword but on my car it does seem to have preserved it quite well.
Anyway, I unearthed a 5/8" AF combination spanner and tried this on the bolt head instead of the offset ring I'd been using.
View attachment 15213
The flat combi allowed more torque to be applied than with the ring since the offset of the latter causes the ring to twist off under load. The increased torque broke the rust bond and out the stub popped!
I've stripped down the old trailing arm and cleaned up and removed the bearing races from the spindle support.....
View attachment 15214
.....ready for some shiny new goodies.....
View attachment 15215
Should keep me out of mischief for a while .....
After some unhappy delays and the generally unwelcoming temperature in the garage, I finally have one new trailing arm built and installed. First job was to loose assemble the spindle support, caliper mount bracket and parking brake flange plate to the arm to align the studs while I punch them in....
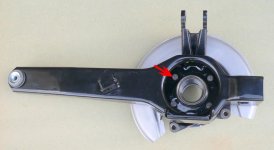
....then fit the nuts and washers and torque up to ensure the studs are fully seated.
I strip down the arms again and fit the outer races of the spindle bearings to the spindle support then dry assemble the support, inner races, bearing spacer and the thickest shim available to the bearing assembly tool....
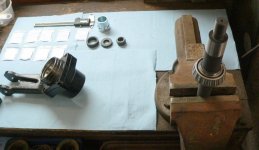
..... torque up the nut to 100 lbf ft and check the end float.....
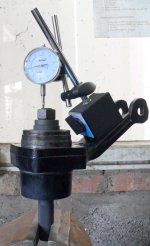
I substitute a thinner shim to reduce the end float and achieve .004". Although within tolerance (.001" to .008") I lap the shim to achieve .001".
Since the assembled arm is heavy I prefer to assemble it on the car. With the arm supported by rope round the chassis I fit a length of fishing line through the split pin hole in the trailing arm bolt, feed it through the washer, frame, trailing arm bush and frame again and while lining up the arm by hand, pull the bolt into the bush. Once started I push the bolt through, fit the washer and nut and remove the fishing line.
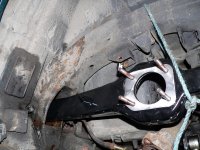
Since I'm fitting new arms and the rusty old toe adjustment shims had to be cut off, I fit the shim pack half and half either side of the bush. I'll check toe when back on the ground.
The spindle support, caliper mount bracket and flange plate are assembled to the arm, the stud nuts torqued to 30 lbf ft and the parking brake parts fitted ( much easier without the spindle in)
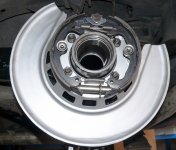
The bore of the spindle support and the bearing races are loaded with grease and fitted together with the spacer and shim then the inner and outer seals fitted.
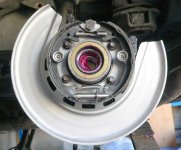
With the spindle inserted and pulled in with the installation tool.....
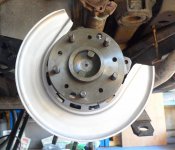
......the dust deflectors, drive flange and a new washer and nut are fitted and the assembly was torqued up. (I can confirm that any 80 year old lying supine on a smooth floor under the car will find applying - and reacting - 100 lb ft torque not easy) Eventually I get a satisfying click from the torque wrench then use my impact wrench to align the nut to the split pin hole and fit the pin.
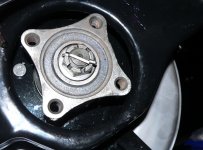
With the brake rotor cleaned up and fitted I check the run-out with the rotor indexed one stud at a time. This gives values between .012" and .003" - and me a problem.
The .003" is acceptable but with the rotor in this position, the parking brake adjuster hole in the spindle is covered. The alternative of shimming out the run-out with the rotor correctly fitted is unattractive, so with a bit of careful lining up and manipulation I find the brake adjuster can be indexed with a screwdriver through the vacant rivet holes instead.
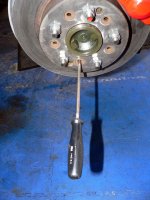
With the brake shoes adjusted, I refit the caliper, replacing the brake hose and steel caliper line at the same time.
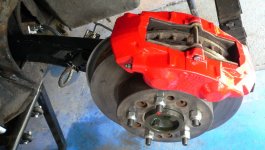
So, all I have to do now is fit and re-assemble the other trailing arm, refit the shocks, half shafts, strut rods and road spring, adjust the handbrake, bleed the brakes, lower the car back on the ground, check and adjust the camber and toe-in and I'm back on the road!
Hopefully fitting the second arm will be a little quicker!


