What have YOU being doing or are you planning to do with your Vette?

Jack Cooper

Well-known user
What have i been doing with my C6? Not much, I'm afraid. I think I've said this before, but I give the battery a boost charge every 2 weeks and give it a 10-mile run (if the roads are dry) to get everything up to temp. etc. then put it back in the garage........Plans? Am seriously considering selling it in the new year, so if anyone is genuinely interested, call me on 01256-764193 - or e-mail jackcooper350@talktalk.net - and I'll provide comprehensive details. (Basic details: 2007 coupe/both tops/
6-spd. auto with paddle-shift/33,300 miles/asking £23K).
J.C. (1911)
 

kentvette

CCCUK Member
leverage with longer spanner’s or wrench, you can always break the split pin with leverage.
I guess that's what I'll be trying next - I've just got to work out how to make my spanners longer! Some sort of bar added, or looped through the other end of the ring......

Why not just drill out the pin ? That`s the usual way to get a rusted one out of a bolt .
Alas, the split pins (on both sides apparently) have been put in from the front of the car, facing down at an angle of about 45 degrees, so you just can't get in there in line with them.

I've only been on the work a day and I'm sick of it! I admire you guys who do these major restorations.
 

BobbyV8

CCCUK Member
I guess that's what I'll be trying next - I've just got to work out how to make my spanners longer! Some sort of bar added, or looped through the other end of the ring......


Alas, the split pins (on both sides apparently) have been put in from the front of the car, facing down at an angle of about 45 degrees, so you just can't get in there in line with them.

I've only been on the work a day and I'm sick of it! I admire you guys who do these major restorations.
This is how to get more leverage.
 

Attachments

  • mrGchqh.jpg
    mrGchqh.jpg
    258.6 KB · Views: 11

johng

CCCUK Member
I've only been on the work a day and I'm sick of it! I admire you guys who do these major restorations.
Yes, but if you'd taken the body off the chassis as part of a major restoration, then getting the trailing arms off would be really easy :)
 

kentvette

CCCUK Member
Yes, but if you'd taken the body off the chassis as part of a major restoration, then getting the trailing arms off would be really easy :)
What's that quote from Apocalypse Now? - "The horror, the horror....." :) :)

Good news is that the nut is free! Linked up a couple of spanners, that gave me the angle to lean into it. And, the bolt is turning freely as well, so have pressed on with the rest of the dis assembly. I'm swapping the carrier assembly into the new TA's so alas, the spindle will need to come out to allow me to get to the nut. So, a trip to my buddy in Tours who has the specialist tools. But on this side at least, the bearing feels perfect.
8469

A day off tomorrow.. we're going shopping!
 

kentvette

CCCUK Member
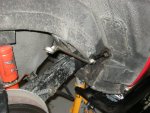
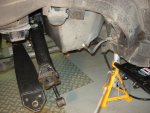
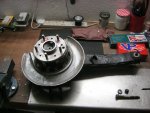
After a day and half away from the car dealing with shopping etc, I made good progress and the first TA assembly is out. The bolt punched out relatively easily, although of course its a bit fiddly as the alignment of the and wheel arch body work don't allow a straight run with the punch. I was surprised to discover that the TA did not just "drop" out when the bolt was released, and needed a lot of manipulation and encouragement from the club hammer!

I still cannot remember how I tackled the removal of the bearing carrier from the TA before, considering I did not press out the spindle! I can't begine to imagine how to remove the hand brake shoes with the spindle in place!

8521

8520

Such fun!
 

antijam

CCCUK Member
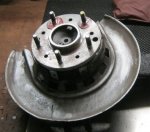
What are the two red rings over your wheel studs?

Capture.JPG

Has someone tried to shim out rotor run-out? Doesn't bode well......
 

Forrest Gump

CCCUK regional rep
Good work Stephen (y)

Compared to the usual beefiness of most of the bolts on a C3, the spindle bolt seems quite lightweight to me given the pounding it must take. It is in double shear loading though so guess it can handle several tons of force. My old spindle bolt lives on Ross’s car now.....there was a story there Ross?

47842E71-5BF2-4DF7-961D-320022C8CA97.png
 

Roscobbc

Moderator
Good work Stephen (y)

Compared to the usual beefiness of most of the bolts on a C3, the spindle bolt seems quite lightweight to me given the pounding it must take. It is in double shear loading though so guess it can handle several tons of force. My old spindle bolt lives on Ross’s car now.....there was a story there Ross?

View attachment 8524
A story indeed. Hadn't used the car for a while and taking for an an MOT test I couldn't figure why when accelerating gently the rear end seemed to be trying to kick out to the offside. Conversely when slowing down it felt like it wanted to do the opposite thing. Some might have explained it as normal wear & tear etc. When you live with a car for 15 to 20 years it actually becomes part of you and you are sympathetic with any strange noise or peculiarity. Anyway nothing untoward was found during the mot test although it was now making a strange metallic noise (a bit like an exhaust dragging along the road (and something still unexplained). It passed the mot - surprisingly. It was only later back at home when investigating further and removing offside rear wheel that the reason for the odd handling became apparent. The last inch or so of the threaded end trailing arm spindle bolt had sheared off complete with nut, washer anf split pin. Even worse - the now unrestrained broken bolt had worked it's way through the outer trailing arm bracket (hence the 'odd' handling). Amazingly the only thing that appear to be stopping the bolt from working it's way out of the trailing arm and its inner support bracket (and a consequent catastrophic suspension failure) was surprisingly the 'hard' brake line leading to the inside of the trailing arm. Just in the way enough to restrain the bolt (which was protruding an inch or more).
There was no logical explanation for how (and why) a large high-tensile bolt could shear. I hadn't wallopped a kerb which would have been a reasonably explanation.......weird.
 
Last edited:

kentvette

CCCUK Member
Good work Stephen (y)

Compared to the usual beefiness of most of the bolts on a C3, the spindle bolt seems quite lightweight to me given the pounding it must take. It is in double shear loading though so guess it can handle several tons of force. My old spindle bolt lives on Ross’s car now.....there was a story there Ross?

View attachment 8524
Funnily enough, June and I were talking about that very story this evening, while examining the old TA bolt. There really isn't much there, considering the work it does, and we were then remembering Ross' story of broken bolt. It's been worrying me ever since, hence the work now! I confess, I didn't "spring" for S/S bolts though and went with the standard items.

The carrier assembly has now been removed from the TA and the shiny new TA prepared (it needed a tiny bit if finessing to get the carrier to be a nice fit in the hole, which I had been warned about). It has to have the new carrier bolts pulled into position and I'm just wondering of I can do that as I tighten the nuts down to re-fit the carrier. Remembering to get those pesky brake shoe retainer pins in place first of course!
 

kentvette

CCCUK Member
What are the two red rings over your wheel studs?

View attachment 8522

Has someone tried to shim out rotor run-out? Doesn't bode well......

Yes, actually me, some years ago. The entire bearing and carrier assembly were new but of course the flange was not mated to the rotor as it would have been at the factory. So yes, it was a tiny bit "out". But following the method of the sadly missed Paul Golledge, I used a Coke tin to knock up some shims - now its perfect!

It's because I have changed the bearing and carrier assemblies before that I was so frustrated in not being able to remember how I got to attaching nuts! On both occasions when the bearings failed in the past it was about two days before a major journey away somewhere here in France, so the work was done in a blur! This time, I'm making notes!
 
Top