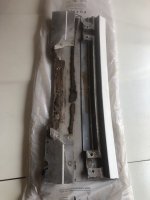
72 Corvette - Restoration Updates

TimP

CCCUK Member
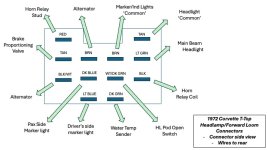
Just did a thorough review of the headlight/forward loom and decided it was easier to create a quick reference for the headlight connector to show which connector goes where rather than keep tracing it out with a greasy finger on the wiring diagram. Sharing just in case others in the same position find it useful.......

It's worth noting that Chevrolet used the same colour wiring for two different-ish functions and also that, possibly due to the car's age (or mine come to think of it), the BROWN cable seems to look like BLACK.

I think I have the right labelling (I did a continuity check with each connection to check) but if you think there's an error please let me know.


Slide1.jpeg
I think I know why the main beam light idiot (how appropriate) light isn't working now- I'd forgotten about the foot switch behind the pedals to toggle the main beams on and off (or dimmer switch as it is confusingly labelled on the wiring diagram) :rolleyes:
 

TimP

CCCUK Member
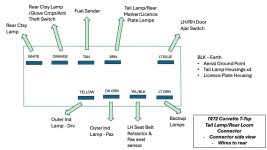
... and here's the equivalent diagram for the tail light loom....
Slide2.jpeg

Having removed a couple of short circuits in this circuit it all tested out OK and new LED bulbs have been installed at the rear. The two shorts were....
1) The drivers side door open switch was earthing incorrectly and ..
2) The courtesy light is a BA 15D bulb with non-offset pins and two contact points on the base but the casing is not functional so power has to be applied to both contacts for the light to come on. The previous owner had fitted a single contact bulb with a functional (ie negative) casing and thus it didn't work and worse, the single contact on the bulb shorted out the two contacts in the socket.

Moving on to the front loom a number of faults prevented the loom functioning properly, one being an 'operator error' - if the headlight loom connector that mates with the connector on the bulkhead isn't tightened up fully some of the contacts don't touch and you spend half the day chasing through signals that don't get to where they are supposed to go. We live and learn.....
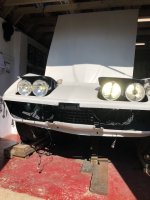
Anyhow, once all the problems were fixed a new set of LED bulbs were fitted across the board (apart from side marker lamps for the moment) and it all seems to work quite nicely. (y) There's some wiring to tidy up and make secure and that will probably be done later in the week. I also need to replace the headlight pod open switches which were broken on arrival. I have new ones so that shouldn't take too much time to do.

Electrical 14.jpg

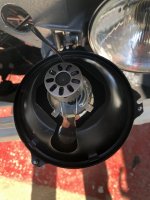
The LED bulb for the 4 headlights have little fans on them to help the LEDs keep cool - they each take about 3 amps rather than the 5 amps of a halogen equivalent. I will table a full set of current readings with various light combinations on Tuesday when the new indicator bulbs (x4) will be fitted.
Electrical 13.jpg

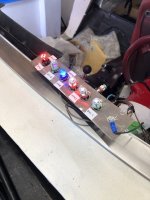
All the dash lamps now work correctly (except the seat belt light) - in theory I could replace the dash plates that I made and substitute the proper items but I will get the engine turned over and started before doing that so I can keep an eye on things.
Electrical 15.jpg

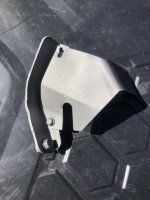
I have also fitted the chunky earth cable that goes between the block and the engine mount on the chassis. This goes with the starter heat shield.
Electrical 16.jpg

This week I will finalise the wiring looms and then try turning the engine over with the starter.. Fingers crossed....
 

TimP

CCCUK Member
Things have been a little of late on the Corvette front: we have builders doing some (much needed) repairs on our house which has made access to the garage and workshop a little tricky and we have a new arrival at our house....
Rolo 1.jpg

He is a rescue dog from Spaniel Aid and despite being only 9 months old we are his fourth owners. He's a lively chap (and how) and to make sure that he settles in quickly and gets a sense of permanence we are spending a lot of time with him.

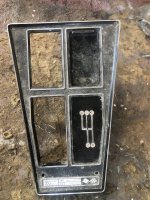
However, that has not stopped me working on some areas that I can do whilst keeping an eye out. So ....... the gear lever console looked a bit of a state and needed some attention. The gear lever gaiter was completely perished and had to be cut off.

Interior-92.jpg

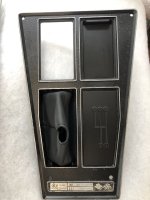
It now looks a little better, not perfect by any standard, but quite useable although I still have to scrape the new black paint off the gear pattern and purchase a new plate at the bottom. As an fyi the new gaiter I bought was a very poor fit and needed quite a bit of angle grinder therapy to make it fit properly.
Interior-91.jpg

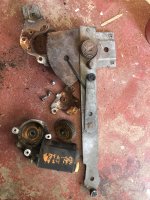
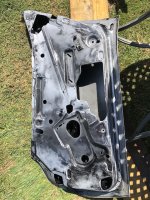
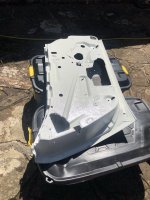
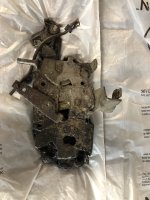
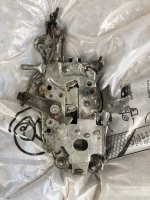
On the door front I purchased a couple of good condition doors (carcase only) a while back and started working out what I need to do to get my original power windows working again. Most of the mechanism shown in the picture is scrap: the power window motor pinion has very few teeth left, the regulator teeth are all worn away and one of the roller wheels (not shown) has clean rusted off. The return spring is very rusty but can still do some pretty serious finger damage. Fortunately most of the parts can be bought separately and a shopping list for both windows will be put together in the next week or so.
Interior-93.jpg

The drivers door was next on the list....
 

TimP

CCCUK Member
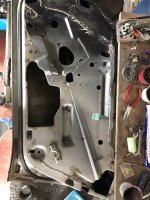
The drivers door shown is in really good shape..
.Exterior 64.jpg
... but needed a little cleaning and some surface rust removal just where the window emerges from the door. Might as well treat it whilst everything is apart.
Exterior 65.jpg
With a little Fertan rust remover it came out quite nicely and thew rest of the door was cleaned up ready for paint.
Exterior 66.jpg Exterior 67.jpg

My car will be white when complete so I applied a coat of white epoxy primer to the outside and to anywhere I could reach inside to try and keep rust at bay.
Exterior 68.jpg

The locks were pretty mucky so were cleaned, greased and (not shown) refitted.
Exterior 69.jpg Exterior 70.jpg

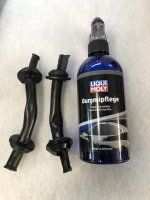
The wiring protectors looked to be in pretty poor shape, very hard and unyielding and were covered in white overspray. After cleaning they were sprayed with Gummipflege (rubber lubricant) and they are now beautifully supple. I have used this on my daily driver to refresh the window seals as they are leaking and it's worked a treat. Be careful when Googling for this - you'll get a lot of things back you might not have expected.... Ho hum.
Exterior 71.jpg

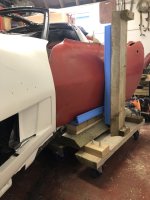
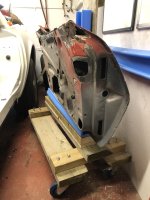
I think I have mentioned before these doors are really heavy as they have the later side intrusion beams so to help with this I made a door carrier which presents the door just at the right height for the hinges. Holding one of these doors in place whilst trying to put the bolts in just isn't possible.... In the picture is a '72 door that is much lighter and easier to use for testing. It has a little corrosion at the top but otherwise is in quite good shape. When I get a little time I will repair this one using the 'good' new ones to make patterns from. Good doors seem to be quite hard to get hold off so perhaps someone will be able to make use of it....
Exterior 72.jpg Exterior 73.jpg

To be continued.... By the way this update represents precisely 5 years since the car arrived on my driveway. Must be mad.
 

TimP

CCCUK Member
One of the problems I have continually suffered from on this project (apart from not being able to find anything I put down 5 seconds ago) is trying to do too many things at the same time: right now I am trying to fix the wiring (nearly done), rebuild and fit the doors (no where near finished), start the engine (not quite ready there yet), procure and/or repair the interior trim and lastly, fit a new front bumper. (More on this next month) Result: chaos in the workshop, bits everywhere, can't move without treading on something or knocking it over. The only thing for it was to put this all to one side and start something else.... yep, that will fix it.

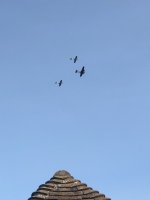
So, suitably inspired by the (Blenheim led - I think) Battle of Britain memorial flight flying over my house a few times today ....
BofB 1.jpg

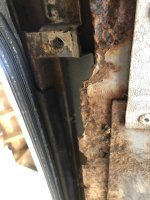
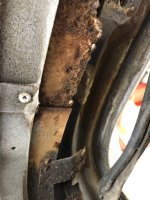
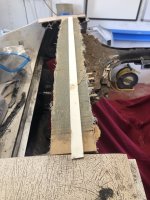
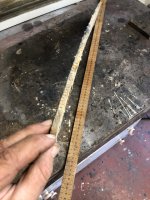
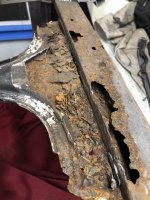
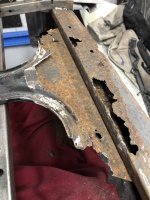
I decided to have a closer look at the one remaining part of the birdcage that I didn't get round to when I took the front body moulding off. This being the rear 'bow' just behind the T-Tops - quite an important part of the structure and integrity of the birdcage. It's comforting to know that it's in good condition.

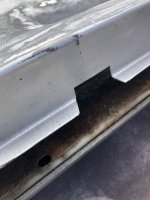
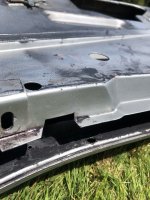
I'm not sure why I put this off for so long but there was obviously some work to do here .....
Body Reinf 49.jpg Body Reinf 48.jpg

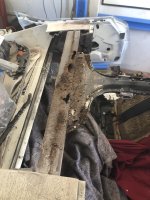
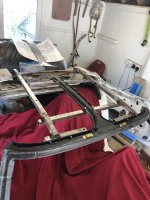
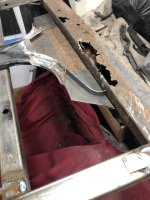
.... but working out how to assess and fix it all was the troublesome bit. Could just patch it up from below - awkward but doable. Or just to be sure, I could cut the roof off and have a closer look....Surely not.

Body Reinf 50.jpg Body Reinf 51.jpg

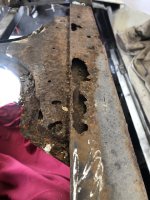
But it's probably just was well I did - it's in pretty poor shape. I'm also fairly glad I didn't try lifting the body off without having a look at this first. That could have been embarrassing.

A little work to do here: first a good clean up and then some bracing will be required. Then cut the offending sections out and replace. Simples.
Probably not actually.....but you'll be the first to know........
 

Mad4slalom

Well-known user
One of the problems I have continually suffered from on this project (apart from not being able to find anything I put down 5 seconds ago) is trying to do too many things at the same time: right now I am trying to fix the wiring (nearly done), rebuild and fit the doors (no where near finished), start the engine (not quite ready there yet), procure and/or repair the interior trim and lastly, fit a new front bumper. (More on this next month) Result: chaos in the workshop, bits everywhere, can't move without treading on something or knocking it over. The only thing for it was to put this all to one side and start something else.... yep, that will fix it.

So, suitably inspired by the (Blenheim led - I think) Battle of Britain memorial flight flying over my house a few times today ....
View attachment 27583

I decided to have a closer look at the one remaining part of the birdcage that I didn't get round to when I took the front body moulding off. This being the rear 'bow' just behind the T-Tops - quite an important part of the structure and integrity of the birdcage. It's comforting to know that it's in good condition.

I'm not sure why I put this off for so long but there was obviously some work to do here .....
View attachment 27586 View attachment 27585

.... but working out how to assess and fix it all was the troublesome bit. Could just patch it up from below - awkward but doable. Or just to be sure, I could cut the roof off and have a closer look....Surely not.

View attachment 27587 View attachment 27588

But it's probably just was well I did - it's in pretty poor shape. I'm also fairly glad I didn't try lifting the body off without having a look at this first. That could have been embarrassing.

A little work to do here: first a good clean up and then some bracing will be required. Then cut the offending sections out and replace. Simples.
Probably not actually.....but you'll be the first to know........
šŸ«£ you never cease to amaze me Tim, most people would have run for the hills a long time ago but you just assess things calmly, chop the nasty stuff out and just stick it all back together again šŸ‘
In fact šŸ¤” Iā€™m beginning to think if we had by passed the last 3 governments and put Tim in charge, the uk would be in a lot better state than it is now ! šŸ¤£šŸ¤£šŸ¤£
 

TimP

CCCUK Member
Y
This car really is the gift that keeps on giving. Has it spent most of it's life underwater?
You could be forgiven for thinking that - it's certainly my view :). There was a definite tide mark on some of the steel reinforcement assemblies around the floor of the car - particularly the seat belt reinforcement which showed a very distinct water line (steel above, rust below) before it was refurbished. It's a Florida car (Vero Beach) and I would't be surprised if it had spent some time in a swamp or something - possibly even salt water judging by the way some of the birdcage disappeared.....:rolleyes:

I think in this particular case the water that did the damage came from rainfall - a previous owner had put transparent sealant around the back of the T-Top along the top of the chrome embellishments. I think this actually trapped the water inside and it had no option other than to corrode its way out. When I come to fix this (next few weeks) I will definitely make this a much more protected piece of steel in terms or paint treatment, drainage and sealants.
 

TimP

CCCUK Member
šŸ«£ you never cease to amaze me Tim, most people would have run for the hills a long time ago but you just assess things calmly, chop the nasty stuff out and just stick it all back together again šŸ‘
In fact šŸ¤” Iā€™m beginning to think if we had by passed the last 3 governments and put Tim in charge, the uk would be in a lot better state than it is now ! šŸ¤£šŸ¤£šŸ¤£
That's very kind of you - don't think for a moment though that I haven't thought of making that run.....:) I think most members realise that with this car the journey is just as important to me as the destination - if I can put it this way. So - yes, one more problem to fix but there is still a definite feeling in the garage of a downhill slope stretching out in front of me (famous last words). I am quite looking forward to fixing this - I really quite like metal work and glassfibre stuff (the wiring I've been doing recently has been more than a little frustrating and tedious to be honest) and it will enable me to get the rear compartments, removable rear window and the electrical bits found in the back there all in the 'done' category which will be nice. If I didn't have to do a lot of dusty paint prep (and lift the body) I would put some carpets in too - that would be a real motivator.

As far as running the country is concerned I'll quote Marx (that's Groucho not Karl) on this. 'Think of the chaos ..... think of the fun'.

Have a good week everybody! Lots more to come.
 

TimP

CCCUK Member
Quick interim post on my T-Top metalwork that is letting in a lot more air than it should.....

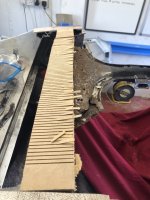
The 'bow' at the rear of the birdcage has a curvature to it that is going to make it a bit of a piglet to fabricate. A gauge of some sort that I could use as a template seemed like a good idea so using some of that mdc sheet that can be bent I glued it with double sided tape to the bow top surface and covered it with glass fibre filler. A reinforcing strip of aluminium was bonded to it to give it a little more rigidity. Looking at it sideways on (after curing) the curvature becomes a bit more apparent.

Body Reinf 52.jpg Body Reinf 53.jpg Body Reinf 54.jpg

Next step is some bracing to keep everything aligned whilst various bits of birdcage are chopped out.... I also took some measurements just in case, for what ever reason, the jig/brace failed. Reassuringly, the dimensions for and aft on both sides of the car are identical, so despite everything that has happened to this car it all seems to be square.

Body Reinf 55.jpg

The part of the birdcage that needs refurbishment is the T-Top front to back 'I' shaped brace and the transverse bow at the back. The'I' shaped brace is made of two pressings spot welded together. After a good deal of thought, the plan is (rightly or wrongly) to remove the rusty top section of the 'I' shaped brace and fabricate a replacement, then remove the lower section and fabricate a replacement and then weld the top section in place. This way I will be able to ensure that the two T-Top pieces are correctly positioned and aligned before the rusty bow section is removed. Also as I will be plug/puddle welding the pieces together I need to make sure that top piece has all the right holes in the right positions to give the join some strength.

So cutting out the rusty part of the top section gives.....
Body Reinf 56.jpg Body Reinf 57.jpg Body Reinf 58.jpg
Just a thought but putting in a drain hole might be a good idea ......

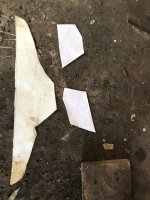
Then making up some templates ...
Body Reinf 59.jpg
.... and then cutting out some new metal... After some final adjustments and fettling they are put in place as a trial. The top piece has a slight curvature to it - to match the bow it spot welds to - and the gauge I made earlier was used to ensure that the curvature was the correct amount.
Body Reinf 60.jpg Body Reinf 61.jpg

These new pieces will now be tacked together (probably after a bit more fettling) and put to one side whilst I remove and replace the lower part of the T-Top metalwork. That's next week spoken for and then comes the tricky bit - making a completely new curved box section bow. :unsure:
 

Mr. Cricket

Committee Member
Great work as usual Tim and loving the new Doggy (coming from a house full of 5 doggies!) Parts are still in a box in the Corvette cave. PM me your address and I'll get one of our vans to drop them off.
 

rubyragtop

Committee Member
Always interesting and entertaining to read another episode of your journey Tim. The detail in your magazine articles also add flesh to the jobs that you share on this thread. To realise that you are self taught in all of this is nothing short of amazing,
 
Top