72 Corvette - Restoration Updates

Dazaa

Well-known user
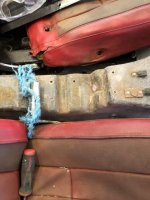
Not the best pic but I wrapped mine in leather, used fibreglass matt to reinforce the cracks and filler to smooth everything out
 

Attachments

  • 3FA7B35F-64AB-43D6-9F6D-E5944CAFE65D.png
    3FA7B35F-64AB-43D6-9F6D-E5944CAFE65D.png
    1 MB · Views: 17

Roscobbc

Moderator
Dazza - that looks really very well done. You've done a nice job. I think the original centre console (as fiited to early C3's) was poorly unsupported and would crack if you leant on it when clambering across the seats perhaps trying to exit/enter the cabin from the passenger side. I've noticed that replacement centre consoles from Vette specials often include the wording "with additional strengthening" or something similar - wonder if that means an upgrade to the earlier design?
 

Adtheman

Well-known user
Thanks for the tips, everyone. I remember meeting a C3 convertible (silver I think) owner at the annual classic car show on the Western Lawns at Eastbourne a few years back who had done a lot of work on his car and he said that the only thing that he wished he'd got someone else to do was the seat covering - so I knew it must be hard!

I'll have a look at the old coverings tomorrow and see how they look.
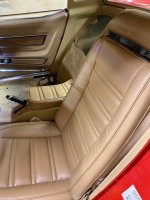
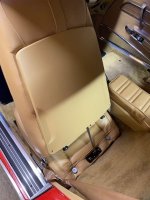
I did mine a few months ago, the bases really easy,IMG_8029.jpgIMG_8030.jpg the backs i managed to split the first one i did trying to make it perfect which they never are anyway. result was Scott at CK having to order me a single rear cover. was all leather so not cheap. I wanted to do all the interior myself not to save money but just to say ive done it. In the end i got an upholsterer friend to finish them off. Happy with the end result though.
 

Chuffer

CCCUK Member
Having read on forums and Youtube how difficult DIY recovering can be and needing the correct tools , I decided not to do mine myself when doing a near complete interior refurb . I knew i would never be happy with my seats if I had a wrinkles or sagging on the original cushions , so bit the bullet and ditched the vinyl covered cushions and bought brand new leather ones . Really glad I did as it transformed the interior and sold the originals on Ebay very quickly that helped offset cost of new leather seats . ☺️
 

TimP

CCCUK Member
It's been a little quiet on the Corvette front these last 2 weeks but I have managed to do a few things., starting with ....

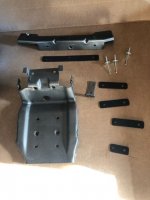
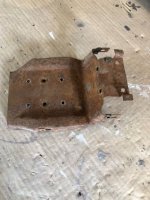
Floor reinforcements! The parking/emergency brake plate was fairly corroded but structurally good. The floor area under the plate was cleaned up.
Floor Reinf HB 1.JPGFloor Reinf HB 2.JPG
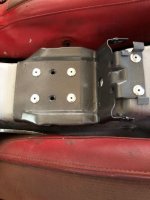
The plate was originally secured with big head fasteners on both sides but pop rivets wouldn't give that strength/support on both sides so I created some reinforcement plates for each of the items. I painted them to stop them corroding - not original and theoretically they will never be seen but I don't want to have to do this again .....

Floor Reinf HB 3.JPG
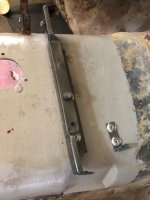
As fitted they look like this ...

Floor Reinf HB 4.JPGFloor Reinf HB 5.JPG

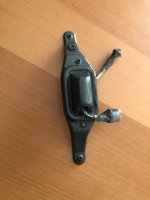
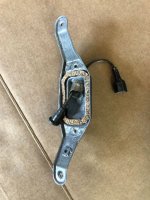
The licence plate was in very poor shape - borderline junk to be honest. However I decided to fill some holes with weld, cleaned off the rust and reinforced it with fibreglass. After painting if looked like this. The gasket was unserviceable so I made a new one from cork/rubber gasket material.

Taillight 1.JPGTaillight 2.JPG
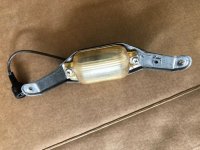
Now ready to go back on. It hasn't got a bulb in it at the moment but I'll put an LED in it in due course.
Taillight 3.JPG

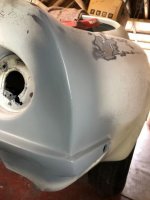
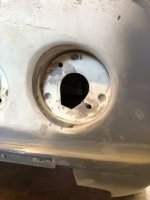
Lastly I repaired the damaged rear light attachment area - the holes were badly damaged on both areas. Unfortunately the light recesses on the driver side are in even worse shape so they will be repaired next week.
Body pax rear qtr 10.JPGTaillight 4.JPG
Not shown, I also managed to remove the rear wiring loom. I will have a look a this later in the build but I will almost certainly replace it. Probably be the cause of endless electrical problems if I don't.
 

TimP

CCCUK Member
Well spotted! It holds up the end of the propeller shaft - the rope goes through the seat belt mounting bolt hole. The shaft is still attached at the diff end but without a gearbox in place it rubs on the rear cross member if I don't hold it up.. In good weather (like today) the car goes on occasional forays out of the garage onto the driveway and it makes a horrible noise if it's not supported. Removing the prop shaft, cleaning it up and fitting new joints is on my list of things to do but it's a long, long list.
 

Oneball

CCCUK Member
I was thinking it was some Bubba fix from the past.

Did the lens screws for you numberplate light come out ok? I’ve been soaking mine and the wont budge and don’t really want to use heat.
 

TimP

CCCUK Member
Mine wouldn't come out easily but I decided to put the whole thing in the electrolysis bath over night to get rid of the rust before trying further . After that they came out without too much fuss. I had expected the lens to crack when I removed the screws as most of the plastics in the car have got very brittle - the lens on the interior lamp under the rear window being a good example. However although a bit yellow and discoloured the lens is pretty solid.
 

TimP

CCCUK Member
Forgot to post this pic with the last lot.
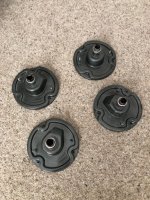
The tail lights came out after a bit of a struggle. Most of the threaded posts that attach them to the bodywork were bent. The recesses are damaged - I really can't work out how that happened unless who ever did it damaged the recesses installing the lights with the posts damaged.... I'll never know.

Anyhow, posts straightened (as much as possible anyway), rust removed and painted.
Taillight 5.JPG
 

Mad4slalom

Well-known user
It's been a little quiet on the Corvette front these last 2 weeks but I have managed to do a few things., starting with ....

Floor reinforcements! The parking/emergency brake plate was fairly corroded but structurally good. The floor area under the plate was cleaned up.
View attachment 10317View attachment 10318
The plate was originally secured with big head fasteners on both sides but pop rivets wouldn't give that strength/support on both sides so I created some reinforcement plates for each of the items. I painted them to stop them corroding - not original and theoretically they will never be seen but I don't want to have to do this again .....

View attachment 10319
As fitted they look like this ...

View attachment 10320View attachment 10321

The licence plate was in very poor shape - borderline junk to be honest. However I decided to fill some holes with weld, cleaned off the rust and reinforced it with fibreglass. After painting if looked like this. The gasket was unserviceable so I made a new one from cork/rubber gasket material.

View attachment 10322View attachment 10323
Now ready to go back on. It hasn't got a bulb in it at the moment but I'll put an LED in it in due course.
View attachment 10324

Lastly I repaired the damaged rear light attachment area - the holes were badly damaged on both areas. Unfortunately the light recesses on the driver side are in even worse shape so they will be repaired next week.
View attachment 10326View attachment 10325
Not shown, I also managed to remove the rear wiring loom. I will have a look a this later in the build but I will almost certainly replace it. Probably be the cause of endless electrical problems if I don't.
Well done Tim, a few more items ticked off your list👍
 
Top