C3 Race Car Build

Chuffer

CCCUK Member
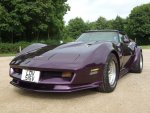
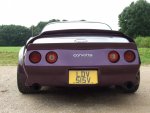
Ooops ! Looks like lots of work ahead :eek: I had to have widscreen replaced on my car due to a creeking crack in one corner . Even the pro`s who fitted new one really struggled to break the seals . I watched the whole process and even with three guys on at one point , it finally came out looking like it been blasted by a shot gun ! Fortunately the steel A pillars and top frame of the `birdcage` were sound . Good luck with what looks like a big project . Pity regs will not allow the flairs you wanted . I have flares and the kipper tie to go with them !!DSCF9440.JPGDSCF9447.JPG
 

Daytona Vette

Well-known user
Looks cool Chuffer are those Cherry Bombs (I like the way the tail pipes are let into the rear valance and not just hanging) what size is the rubber at the back?
 

Chuffer

CCCUK Member
Hi Guys ,
Wheels are 10 inch x 15 front and 12 inch x 15 rear Centre Line Convo Pro deep dish alloys . Rear rudder is 295 / 50/15 . The exhaust tails are Supertrapp and I took the cat off too . My wife says it`s too loud now but I just give it more gas and can`t hear her complaining :ROFLMAO:
 

Oneball

CCCUK Member
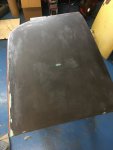
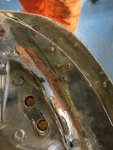
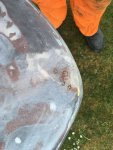
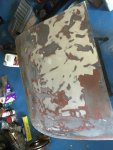
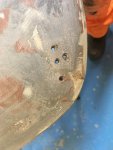
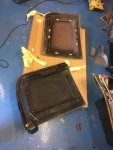
Both roof panels done. One side has had a bodged repair with some rivets. Looks like there’s a crack so will need grinding back and fibreglassing.

51358C18-B07E-4C38-9FCC-0892E0B64A24.jpeg948E02A8-635B-44F8-BA7F-6691429266ED.jpeg9898C96F-5F5F-4EB9-9759-8FE9F3E5F730.jpeg29EAC1D9-D618-4A13-A38B-E1DAB50390B8.jpeg9F1FCED0-D43B-4AD2-8AC6-6D9ECEF67534.jpeg
 

Dazaa

Well-known user
How hard is it to remove the stainless trim from the edges of the T tops? Totally overlooked removing them when stripping the paint off mine
 

Oneball

CCCUK Member
The the front ones have little barns and just require a gentle touch with a screwdriver. The side ones are rivets. The seal is screwed into captive nuts. All bar one of which pulled out of the fibreglass so am going to have to look at repairing.

You’ll have to drill a biggish hole in the frame to get the river ends out or they’ll be rattling around.
 

Oneball

CCCUK Member
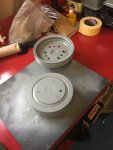
Hopefully as people are starting to go back to work the balancing shop will be open soon, so damper and pulley cleaned and painted

45AD00ED-E3D1-4EC1-AF78-D0395F2B27D1.jpeg

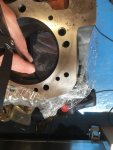
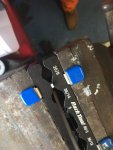
Compression rings checked for gap

B9927FBF-ED44-473C-8A27-B3549A300196.jpeg

And filed to spec

01308EB0-479D-4493-BD89-A8EA0A762092.jpeg

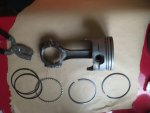
Oil rings checked too

A6EB3C41-F1C9-4068-AD96-199C6C9FD37D.jpeg

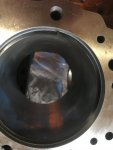
Piston and rod cleaned

0AD1780C-1504-451A-B60B-0013A14CF5CC.jpeg

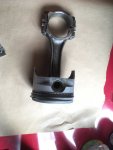
And assembled

7491C8D5-E4CE-49C2-8941-2C1037CEE79C.jpeg


Only 7 more to go, 4 cylinder engines new have some advantages!
 

Oneball

CCCUK Member
Repaired the broken fibreglass in the roof panels and re glued the outer to the inner where they had separated.

6641
 

langlj00

CCCUK Member
Hopefully as people are starting to go back to work the balancing shop will be open soon, so damper and pulley cleaned and painted

View attachment 6626

If you are using the old harmonic balancer - just make sure the outer weight is still attached to the inner.
The rubber on older ones tends to let go, and the outer can slip.
Obviously, this leads to all sorts of issues when trying to set the timing!
 

Oneball

CCCUK Member
If you are using the old harmonic balancer - just make sure the outer weight is still attached to the inner.
The rubber on older ones tends to let go, and the outer can slip.
Obviously, this leads to all sorts of issues when trying to set the timing!

Thanks seems good, it’s a used but not too old Pro Race SFI one. They’re pretty robust and not 50 years old.
 

Oneball

CCCUK Member
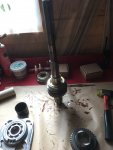
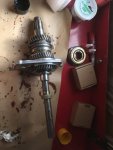
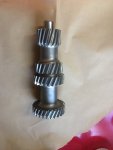
Got the new synchro hubs for the box this week, so ready to start rebuilding

44ADDE92-3AE0-449D-A43E-2091B758394A.jpeg

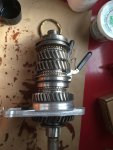
Mainshaft assembled with 2nd gear and 1/2 synchro assembly.

CA65FC1D-A98B-4789-9C77-8A5847FFB5C8.jpeg

1st gear, midplate and reverse gear added

E036F0CC-B336-49E9-A295-A08FC93D69F4.jpeg

3rd gear and 3/4 synchro assembly

765479A5-3EFD-4EB8-B22B-D3D237012611.jpeg

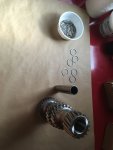
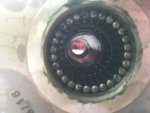
GM don’t seem to have heard of caged bearings :rolleyes:

6517EEE6-5032-4930-A225-BF1F82DF3B3F.jpeg

All 112 needles and six spacers installed.

5AADAAF8-23B9-4BD6-9815-83B13CF83B7A.jpeg
AC88A2E0-AA47-4D03-88A5-EE0748A9E7E4.jpeg


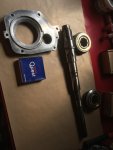
And stopped again for lack of parts. The oil thrower for the front bearing is fractured and a new one wasn’t included in the bearing/gasket kit I’ve got so need to order from the US.

I’m not used to these boxes so don’t as yet know which bits to look out for being worn.
 

Nick B

CCCUK Member
Brilliant picture quality Oneball, loving this story, really appreciate all the detail, keep it coming please.
 

Jimbo64

CCCUK Member
Yep, agree with all others, excellent step by step info, expertise and photos. I always forgot to do photos, as I always seemed to have filthy hands and too engrossed with my work!😂
 

Daytona Vette

Well-known user
I am always amazed at the full spectrum of knowledge and diversity of talents, there is nothing that Oneball can not accomplish - great post keep it coming - looking forward to seeing the Vette finished and hopefully watching the Vette and Oneball on the track.
 

Oneball

CCCUK Member
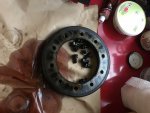
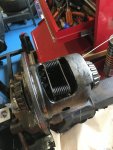
Diff disassembled, the shiny bitty part of the crown wheel is where it has been chattering against the diff cage and those are metal particles
A3397856-FA2F-4F76-90FF-C80B7BDB3C4C.jpeg
540FB0AE-DE79-45B0-A75B-83AF5AA72E6F.jpeg
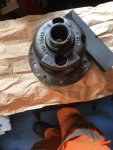
So re-surfaced the crown wheel and cage as good as I can with a stone.
C9784694-9EE0-4F98-AE30-F013FEBD9365.jpeg
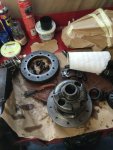
All ready to be cleaned

80C5CC89-7A23-426B-8697-3AE16B037186.jpeg
 
Top