Exciting day - rebuild of 78 coupe

johng

CCCUK Member
Brackets now look a bit prettier and are all fitted to the car.
IMG_20211206_124206.jpg

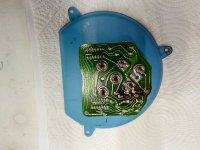
I also had a look at my rev counter today. The filter all seems to check out okay and all the connections to the rev counter are good, so I think it must be the board particularly as there is a dark patch on the back of it suggest a bit of overheating. Something else for Santa to bring :)

IMG_20211206_145430.jpg
 

johng

CCCUK Member
Decided to put the remaining old aircon bits back in the car. The liquid line that runs from the evaporator to the condenser was a right pain. It needs to fit through a gap between the radiator support and the inner fender panel. I think I probably removed it when I took the inner fender panel out and I was beginning to think I would have to remove the radiator support to get it back in, which would be a fairly major job. Luckily after about an hour of pushing, twisting and generally trying every possible angle of attack I finally got the line through the gap and into position. That left the evaporator. Before fitting that I needed to replace the orifice tube which sits in the inlet tube. As seems to be common, my inlet tube was bent and the old orifice tube didn't come out in one piece. Fearing that the new one wouldn't go back in properly either, I bought a repair kit which replaces the end section of the inlet tube and fitted that. I've gone for a variable orifice tube which apparently performs better under idle conditions. I've also put some pipe insulation around the evaporator inlet (the bit that gets coldest) because it is pretty close to the exhaust manifold and was actually touching the heater hoses. So now just have to wait until after Christmas to fit the compressor, condenser, dryer and hoses and then go get the system charged up.

IMG_20211217_151934.jpg
 

johng

CCCUK Member
Yes got everything I need, just not supposed to play with them til after Xmas. Have had to use a few of the new o rings already though. Been fairly busy just sorting out all the old bits, it would have been quicker if I had put the aircon bits back on as I was rebuilding the car. I keep having to remove some things in order to fit others. For example to fit the dryer I need to remove the splash shield underneath it, but to remove that I need to remove the sill cover plate.
 

johng

CCCUK Member
New board for my tachometer turned up a few days ago. Interestingly, it works fine without the tacho filter fitted, but doesn't work if I connect the filter. I contacted the seller who confirmed it doesn't need the filter. Took the car to collect the shopping today and the tacho worked fine, although I think I need to adjust the zero on it as it reads 200rpm without the engine running. The board has a potentiometer to let you do this.
 

Forrest Gump

CCCUK regional rep
No tach filter on mine either, and works fine with the currently fitted MSD and previous stock/GM distributors (both HEI type). I guess the electronics on the replacement boards has been improved to negate the filter, and maybe can’t cope when there is a filter fitted?
 

johng

CCCUK Member
Yes it makes sense that they would build the filter into the board, although I wonder why GM wouldn't have done that themselves.
 

johng

CCCUK Member
Did a bit more on the aircon today. As usual it was a bit of good news and bad news. The good news is I've now got the condenser fitted.

IMG_20211217_152017.jpg

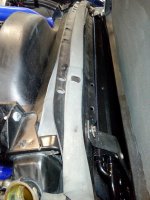
Most people seem to remove the bonnet/hood to do this, but that's a bit tricky on your own. Luckily it was actually pretty easy to just slide the condenser down into position. The only difficulty is that I then couldn't fit the bottom mounting bolts. The good news is that the bottom of the mounting brackets are slotted, so you can fit the bolts first then slide the brackets down onto them.
The bad news came when I went to fit the new compressor. The bolt which allows to you to tension the belt on the old compressor was 7/16 unc, but the new compressor is tapped M12 and a 12mm bolt won't quite fit through the slot or the spacer, which I had carefully cleaned up and painted. Had to drill out the spacer and file the slot, then re-paint. Still should be able to fit the compressor once the paint has dried.
 

johng

CCCUK Member
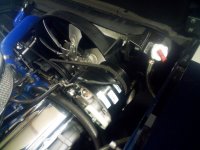
Got a little further today, compressor is now fitted but fitting the drive belt was a bit of a faff. Had to remove the viscous fan, loosen the pas pump and remove the alternator to get the the crankshaft to water pump belt off and the new belt on.
IMG_20220103_141939_9.jpg
 

Chuffer

CCCUK Member
Glad things are still progressing and it`s looking good . As you say John , fitting belts is a real faff . Adjustment and clearance is so tight , been there and done that twice . :(
 

johng

CCCUK Member
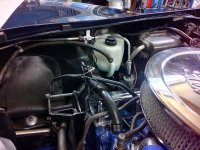
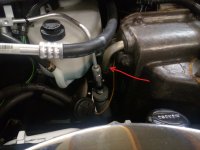
Yet more ups and downs with the aircon over the past few days. I just needed to fit the drier and hoses, so I booked the car in to have it filled with gas and set about fitting the last couple of bits. The drier is a real bar steward to fit!!!! It's tucked in between the coolant tank and the evaporator box.
IMG_20220111_151236_LI.jpg
You can only really access it from underneath the car and there's only room to get one hand in the space, which makes doing up the connections a tad difficult, especially as the spanners need to be at least 1inch across flats, so are pretty large. What was worse was the new drier had 2 schrader valves on it, one of which fouled the coolant tank and the other hit the heater box. I had to lose both the dust covers from the valves, loosen the coolant tank and bend the evaporator pipe to make it fit.
Hopefully I've managed to tighten the joints sufficiently to make it gas tight.
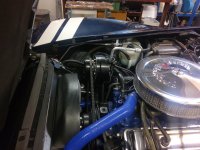
Then just needed to connect the hose to the condenser and compressor, which was comparatively easy.
IMG_20220111_151225.jpg
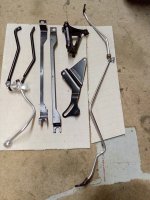
Except that the seals which came with the compressor were far too thin to fill the gap between compressor and hose. I emailed the compressor manufacturer in the states and almost immediately got back the reply that I needed to to buy an additional seal kit to mate this hose to this compressor. So gas charging appointment is cancelled and I'm now awaiting the seal kit. Still no rush for aircon just yet.
 

johng

CCCUK Member
Proper seals fitted to the compressor and R134a adapters fitted to the valves, plus I bought a charging kit so I could test if it is leak tight. Unfortunately it isn't, there is a small leak and even worse I can't find where it is leaking from. I've covered everything apart from the evaporator (which you can't get to) in soap suds and no sign of a bubble and I've tried re-tightening all the joints to no avail. Anyone got any good ideas?
 

teamzr1

Supporting vendor
Have you tried the A/C Freon leak dye ?
As that would show via Ultra Violet light as where gas is leaking out
 

johng

CCCUK Member
I thought you put the dye in with the refrigerant, can you put it in without? At the moment I don't have any refrigerant in the system.
 

teamzr1

Supporting vendor
I thought you put the dye in with the refrigerant, can you put it in without? At the moment I don't have any refrigerant in the system.

Could you just for test purposes use very low air pressure from an air compressor with the dye injected in first ?
 

johng

CCCUK Member
Yes I could, but I am a bit concerned about keep on pressurising the system with air. as even with an air dryer I'll be putting some moisture into the system.
 

teamzr1

Supporting vendor
Yes I could, but I am a bit concerned about keep on pressurising the system with air. as even with an air dryer I'll be putting some moisture into the system.

Yes I agree but if the leak just cannot be found the air test with dye might be an only cheap way to pin down where leak is
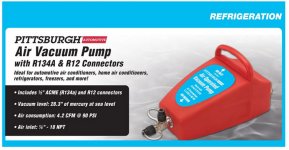
Guess depending on the method you use to vacuum system out

I use an A/C vacuum tool that uses an air compressor to it, and it speeds up the process pulling the air and moisture out

acvac.jpg

$18 US at Harbor freight

AC Vacuum tool
 
Last edited:
Top