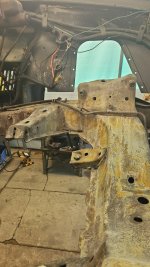
First C3 Vette and luvin it :)

Roscobbc

Moderator
I had a stripped water pump securing bolt on my big block engine. With only three bolts of the same size bit one of perhaps 1/2" longer securing the pump to the engine block it seems that someone in the past had used the longer bolt in a shorter bolt position.......perhaps them overtighened it, bottoming-out in the 'blind' tapping in the block and stripping the thread. Water leaks from under the water pump where it secures to the block were a continual problem. The 'tappings' in the engine block are 'blind'......so if drill and tapping them fractionally oversize to accept a Helicoil or Timesert they don't work so well when the new tap provided (for the new thread you'll need to cut) is equivalent to a first or intermediate tap with no final or non tapered 'plug' tap allowing a thread to be cut the complete depth of the 'blind' hole.
Ordinarily it wouldn't be a issue......you would simply drill deeper down in to the 'blind' hole.........problem being the risk of 'piercing' the water gallery........and being cast iron, not the easiest material to cut a thread in to.......and even worse it being on the front of the block access is poor so to dothe job really well its an engine-out job..........
How was this resolved?......(being as that the OEM bolt if tightened to OEM torque specs would pull out of the Timesert 'coil' in the block).
Changed fixed length OEM bolt for a length of threaded mild steel studding and nut plus washer. On the basis that mild steel would be more likely (being softer) to cut deeper through a short tapped blind hole. Secured with Loctite. Two water pump gaskets (to compensate for the reduced torque) and it seems to be holding out OK.
 

Waynio

CCCUK Member
Got the steering removed aswell.
Power steering on Pitman.

20241011_134502.jpg


I decided instead of the usual black people go for I want a bit different and chose silver.for the suspension.

An hour int blaster cabinet and good for the paint. I chose POR15. I got it from Frost Restorations. Not to far from me.

20241009_162702.jpg


20241017_155015.jpg

20241017_155111.jpg


Whilst under there I scrubbing back for chassis black

Or what ever I go for. I noticed something odd.

I'll update on that later.
 

Waynio

CCCUK Member
Ok then, i the issue i though i had but then didnt but then found another.

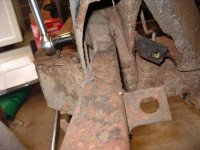
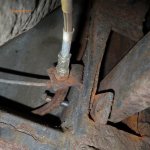
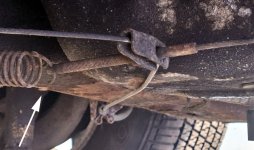
While under the (death trap) cleaning back for chassis treatment, of yet undecided choice, i noticed the handbrake cable rubbing along the bottom of the D/S base. Now i have had other cars which have been similar setup. They had a rubbing strip though. this hasnt though which got me worried a bit.


20241013-162019.jpg


20241013-151719.jpg


Like a daft sod i asked on a Facebook group before i looked into it more myself.

Well it all got me banging my head with saying the body mounts have failed, or the rear cross member is bent.

All to work out the D/S seat is lower due the power seat motor and gubbins

As you can see the chassis is as it was when manufactured.

20241013-162036.jpg


I do wnat to investigate what the lump is for in the P/S seat base.

20241013-162052.jpg


So for the cable ill add a rub strip myself to be sure and grease it up well.


BUT

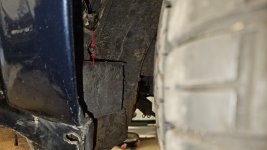
While i was trying to work out this and that i found the D/.S is 40mm lower. from arch to wheel.

The body to chassis is fine and same both side.

20241013-164409.jpg

20241013-164421.jpg

20241013-151743.jpg 20241013-162113.jpg 20241013-162126.jpg
 

Waynio

CCCUK Member
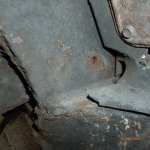
Not sure yet what these are bolts are for as D/S is lower then the P/S.I am thinking there the trail arm bolts maybe ? jsut look small and not looked to close into them yet.

20241013-171809.jpg

20241013-171821.jpg


With all this i reckon the leaf spring has failed/dropped on the D/S. All i can think of.

Now the other day i thought to sod it and ill rebuild the front end and sort the s\engine then et it going and do the rear end rebuild next winter. Now though i am considering fibreglass getting a Monospring for it while it up in the air. Then though ill have to do a full rear end rebuild.

Ah the body mounts, they are bad and maybe the worst part of the car. So ill be doing this as and when. Aslogn as the car rives its fine.


20241010-170952.jpg

20241010-171031.jpg


Quote Reply
 

johng

CCCUK Member
I can see you starting to develop a case of "while I'm at it itis". Those body mounts do look bad and the bolts do look like they are the trailing arm ones. Both these things are so much easier to get to once you've taken the body off :)
This is the best photo I could find of my trailing arm bolt when stripping my car down.
IMGP1617.JPG
 

Waynio

CCCUK Member
I can see you starting to develop a case of "while I'm at it itis". Those body mounts do look bad and the bolts do look like they are the trailing arm ones. Both these things are so much easier to get to once you've taken the body off :)
This is the best photo I could find of my trailing arm bolt when stripping my car down.
View attachment 28303
I just can't bloody help myself. I could of had this on the road in a couple weeks.

Body mounts.can wait untill next winter. Now I just going to ge it going. I am really haha.
 

johng

CCCUK Member
Winter's coming, it's the ideal time to have your car off the road for renovation and give us something to read about whilst we sit indoors in the warm.
 

Forrest Gump

CCCUK regional rep
You need to find another ‘81 and have a look underneath at the handbrake cable situation. I found a post on the US forum where someone has exactly the same “rub” as you. Unfortunately there was no conclusive answer on that thread before it drifted off onto something else.…but it’s obviously something that is seen on other cars.
 

Forrest Gump

CCCUK regional rep
Not sure yet what these are bolts are for as D/S is lower then the P/S.I am thinking there the trail arm bolts maybe ? jsut look small and not looked to close into them yet.
I agree, they do seem surprisingly small diameter bolts for the rear trailing arm pivots, when you consider their job and how beefy everything else is on C3 suspension. They’re in a shear loading so it would take several tons force to break them - the chassis would probably rip first. Getting them out can be a pain if they’re rusted in because as you can see access is tight for knocking them out.
 

johng

CCCUK Member
I think the trailing arm bolts are thicker than they look in the photos, there is a reduced diameter on the bolt end presumably to help assembly. The real diameter is as shown here
trailing arm.jpg
 

Roscobbc

Moderator
I had the very end of a trailing arm pivot bolt snap-off some years back. I'm sure its very rare occurance. Really haven't a clue how it ocurred - some of the guys might remember it. It was certainly a mystery.
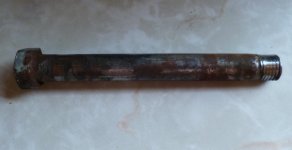
Couldn't figure out why when accelerating the back would 'kick-out slightly to the right. Conversely when slowing down it would kick to the left........all accompanied by strange metallic noises. Took the passenger side rear wheel off and found this...........
End of pivot bolt had snapped-off. Remaining part of bolt then started to work its way-out. It seems the only thing preventing that was the friction of the partly misplaced trailing arm pivot point itself, perhaps cocking over at an angle and partly holding things in place?.
Looking at the condition of the 'shortened' trailing arm pivot bolt it was obvious that it had been like this for a while..........and what would have happened eventually? - something really nasty presumably!
P1050648.jpgP1050651.jpgP1050703.JPG
 

teamzr1

Supporting vendor
How about if a shorter spring was used and then with the adjuster rod get the cable holder so it goes further back
so the now the cable to each wheel's parking brake would miss the floor
Might have to work out a cable length between the wheels ?


pbrake.jpg
 

Waynio

CCCUK Member
Winter's coming, it's the ideal time to have your car off the road for renovation and give us something to read about

As the launch date 0s before 13/03/25 i am dong the least i need to so i can get it back on the road.
Up to now its engine to finish building, refit suspension treat the chassis which at last i `think` i have chosen Lanoguard as it good to get it into the areas i cant paint.

Oh lots in between though. I am not even going to touch the rear end but for a break service. Body rubbers maybe.

You need to find another ‘81 and have a look underneath at the handbrake cable situation. I found a post on the US forum where someone has exactly the same “rub” as you. Unfortunately there was no conclusive answer on that thread before it drifted off onto something else.…but it’s obviously something that is seen on other cars.

How about if a shorter spring was used and then with the adjuster rod get the cable holder so it goes further back
so the now the cable to each wheel's parking brake would miss the floor
Might have to work out a cable length between the wheels ?


View attachment 28308


I looked around to ensure i was right in my thoughts and i found three other 1980-1981 with same set out.

What has shocked me a little is there being so many differences between C3s. my mate has a 79 and there is a good amount of differences in the chassis, rear diff set up to be the main ones.
Aslong at it works it is fine with me. If its been like this for years then its staying as is. If i find problems thoguh i can alter as you suggest.
 

Waynio

CCCUK Member
Today hasnt seem much a happen at all due to the modern crap Merc we have has a leak so rear footwells are rather moist. so i had to attend to that with rear bumper off to fettle a couple of naff design vents seeping water in. .

I just did faff all on the Vette but soak the fuel pump and power steering pump more in degreaser so i can get to painting it this week.

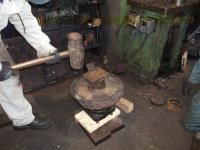
Now though that all other parts are painted i can start to rebuild the front end. insert bushes etc and bolt back up. I need a hydraulic press to get the new bushes in some parts as they will not fit in the fly press.
I may yet buy one for sake of £150 for a cheap 20 tonner. Or like i do i could make one if i have the steel free int shed. Never had one so it will likely come in handy in the future instead of me using lump hammers and sockets.

The power steering set need a clean, this came off the other week and cleaned up.

20241011-111608.jpg


Soaked and pressured washed in most areas. safe not blastng the inlet out outlets.

20241011-134502.jpg


I would like to think all this will be back on in a couple weeks.

Got a goodnpile.now tongue at


20241020_194445.jpg


The press will be handy for fitting these bushes

20241020_194538.jpg
 

Waynio

CCCUK Member
Had a lot on so not managed to get a great deal done. Still got some important stuff done.

I made a press to get the bushes in the arms. Made easy work of that.

20241024_100933.jpg

20241024_101141.jpg


20241025_095446.jpg


20241024_092927.jpg


20241025_095030.jpg


20241025_095442.jpg


20241025_100508.jpg
 

Waynio

CCCUK Member
So those are the bushes. these are the tools i borrowed off a local Vette Head to help prevent the arms from buckling in when they are being pushed in.


20241026-173624.jpg


They just slide over the arms, easy really.

20241025-182935.jpg


20241026-155509.jpg


20241026-155514.jpg


And hey ho there we go :)

20241026-173730.jpg


One thing, well a couple i have forgot to treat and paint. I did start to sand blast one but my god it takes ages to do them.

20241026-173720.jpg
 

Waynio

CCCUK Member
Today i also finished cleaning back the front chassis area so i can paint it soon.

I have been getting my stuff from Frost Restoration. they sell some good stuff there. I am using this lot on the Vette,

FB-IMG-1729964209833.jpg


As said the chassis is prepped now first coat of rust POU15 silver rust prevenititive paint then the top coat black.

Also removed the AC and rest of the smog gubbins the other day.

20241026-173452.jpg


20241026-173448.jpg


20241026-173508.jpg


20241026-173458.jpg


I would love to do a complete strip down and rebuild but that bit more is wanting it running for a while first.

BUT then there is that voice in my head to buy another to do a full resto on it once this is running properly. Would love a 1974 C3.
 

Chuffer

CCCUK Member
An impressive amount of work going on . I agree with you about Frost`s , they do have a great range of products and have used them several times over the years .
Love your homemade press , what a great bit of kit (y) . It sure beats the good old fashioned way of driving out bushes , but these hefty piston valve covers were too big to fit under the electric powered hydraulic press seen in the background . :LOL:
We are all looking forward to seeing your project progress to final completion . DSCF3613.JPG
 

Waynio

CCCUK Member
An impressive amount of work going on . I agree with you about Frost`s , they do have a great range of products and have used them several times over the years .
Love your homemade press , what a great bit of kit (y) . It sure beats the good old fashioned way of driving out bushes , but these hefty piston valve covers were too big to fit under the electric powered hydraulic press seen in the background . :LOL:
We are all looking forward to seeing your project progress to final completion . View attachment 28367

I dont think i could pick up the hammer these days haha. I would of probably made a press for that aswell. I usually use a lump hammer and a few large sockets etc, old school like you say. First time i have used a press but it was needed to get the control arm bushes in. I am sorting a shopping list out for end of this year so ill mite just well replace the wheel bearings aswell. The wheels had slight play in them. could be nipped up. Better to replace while its in bits though, the control arm ball joints are a bit stiff with old hard grease so ill be replacing them again maybe for sake of another £60 or so.

While am at it the shopping also has new brake pads, dampers and springs, all because of the strip down. Or should i say a stripped head bolt from the start haha.

At the minute i am having trouble with this.

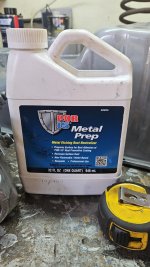
I have treated as with all other parts i have painted with this stuff.

464735097_10235019036081690_408830984519422433_n.jpg

For some reason after three attempts the chassis is coming out like this. each application is wetted out for 20-25 mins, washed off then left to before i paint it.

464902848_10235019036241694_4381988425889363985_n.jpg

I have given up now though after three attempts, going to paint the front section along with the chassis rails this week. tonight possibly. Using the Direct to Metal POR15 Topcoat black.
 

Forrest Gump

CCCUK regional rep
POR 15 is highly regarded by many - I used it on my car when I first started on it. I didn’t find it the easiest product to use tbh. You have to do the etch coat which is highly toxic or bad for you in some way I recall? The paint itself will not come off your skin for weeks if you splash it and brushes are single use only - can’t be cleaned very well.
Then I painted some parts in silver POR15 and it didn’t harden - just stayed soft even after a week. Warming didn’t help. Frost blamed me - inferring bad preparation (definitely wasn’t that) and showed no interest in resolving, so that was it with me and POR15. Cleaning all that unset paint off was an absolute sod. Just my experience and I reckon a bad batch of paint but it put me off using it.
 
Last edited:
Top