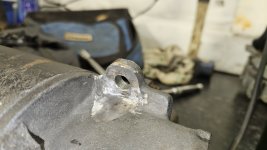
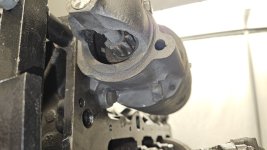
Looking at the starter more aswell that i have here. I can fix it fairly easy with help of metal putty to help level the flange out for a shorter bolt to be used. I cant see why they casings were made like they are. Can anybody explain why they made it that way, or just bad deign ?
You are using an out of date browser. It may not display this or other websites correctly.
You should upgrade or use an alternative browser.
You should upgrade or use an alternative browser.
First C3 Vette and luvin it :)
- Thread starter Waynio
- Start date
johng
CCCUK Member
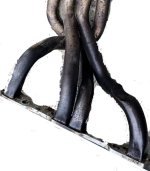
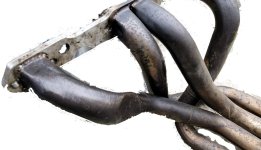
Couple of things Wayne, have you got a photo of the header when fitted to the car? it could be that it's been dented to provide clearance, perhaps to the steering box? Wouldn't be good to remove the dent and then find you had to re-create it!My flywheel is 198 tooth, well i counted 85 halfway so near enough.
And well spotted on the header. Not that its difficult not to spot it though hey. I plan to fix that. Not clue what happened as its how it was when it came off. would take a fair old wack to make that dent though.
Yes it is a threaded hole that one aswell.
I want to sort this out and which to get this week if not tonight so i can put my order in. I have decided to try to rebuild the Quadrajet carb so ill order the rebuild ,kit for that. Pain in the arse i believe to tune up so ill research more on that for when time comes to fit.
Also, I've rebuilt my Quadrajet and am currently fiddling about getting the mixture right (I've got a wideband O2 sensor fitted so I can actually measure what the AFR is). I've actually found the carb to be pretty easy to work on. If you haven't already done so, send an email to Lars Grimsrud at v8fastcars@msn.com and ask him for a copy of his timing and Q-jet tuning papers, they are both really good. Lars is the acknowledged guru on carbs on the US forum.
Couple of things Wayne, have you got a photo of the header when fitted to the car? it could be that it's been dented to provide clearance, perhaps to the steering box? Wouldn't be good to remove the dent and then find you had to re-create it!
Also, I've rebuilt my Quadrajet and am currently fiddling about getting the mixture right (I've got a wideband O2 sensor fitted so I can actually measure what the AFR is). I've actually found the carb to be pretty easy to work on. If you haven't already done so, send an email to Lars Grimsrud at v8fastcars@msn.com and ask him for a copy of his timing and Q-jet tuning papers, they are both really good. Lars is the acknowledged guru on carbs on the US forum.
A quick one
I have messaged the previous owner to ask.
Chuffer
CCCUK Member
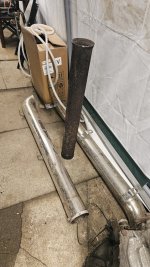
More like made by Stevie Wonder on a bad day !!!!!Who made those headers, a high school auto class ?
Do they not understand equal flow and effects of back pressure and not allowing total exhaust draw of looks like cylinder 1 ?
View attachment 28448View attachment 28449
Roscobbc
Moderator
It looks bad (it is bad!). One completely 'dead' cylinder would mean a a 12.5% power reduction.
One 'squished' header tube will potentially reduce the power to that individual 'pot' by say 15/20% at worse.........but factor-in 7 good cylinders and the engine is probably only down power-wise by a single percentage figure.......likely to be unnoticable by most people?
One 'squished' header tube will potentially reduce the power to that individual 'pot' by say 15/20% at worse.........but factor-in 7 good cylinders and the engine is probably only down power-wise by a single percentage figure.......likely to be unnoticable by most people?
Well got a reply from previous owner about the header dent, and it has always been like that since he imported it twelve years ago..
It is there to clear the steering box.
If it is so bad then ill maybe look for a new set while i am on Summit for parts. . If its been like this for so long then maybe barley a noticeable thing.
It is there to clear the steering box.
If it is so bad then ill maybe look for a new set while i am on Summit for parts. . If its been like this for so long then maybe barley a noticeable thing.
teamzr1
Supporting vendor
It looks bad (it is bad!). One completely 'dead' cylinder would mean a a 12.5% power reduction.
One 'squished' header tube will potentially reduce the power to that individual 'pot' by say 15/20% at worse.........but factor-in 7 good cylinders and the engine is probably only down power-wise by a single percentage figure.......likely to be unnoticable by most people?
Performance is one part but also is that primary for cylinder 1 is reducing the exhaust pulses which limits extracting all exhaust on exhaust stroke
so next firing for that cylinder will have a hotter and dirty charge to cylinder
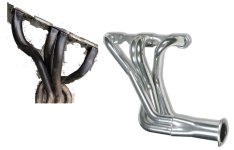
Comparing old header to another brand at Summit racing, notice how cyl 1 primary is slanted more rearward to have more clearance for steering gear
For some reason for old header someone hacking on cyl 1 as the shape to the flange looks different then the others ?
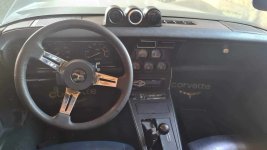
I have the gauges still which i have removed but the Innovate LC-1 Digital Air/Fuel Lamba is still fitted. I read up on it and it blew ,my head. I hate tech and using a lap top to tune it scares me lol. Ill see how that goes and poss fit the gauges again, i just didnt like them stuck on the dash.Couple of things Wayne, have you got a photo of the header when fitted to the car? it could be that it's been dented to provide clearance, perhaps to the steering box? Wouldn't be good to remove the dent and then find you had to re-create it!
Also, I've rebuilt my Quadrajet and am currently fiddling about getting the mixture right (I've got a wideband O2 sensor fitted so I can actually measure what the AFR is). I've actually found the carb to be pretty easy to work on. If you haven't already done so, send an email to Lars Grimsrud at v8fastcars@msn.com and ask him for a copy of his timing and Q-jet tuning papers, they are both really good. Lars is the acknowledged guru on carbs on the US forum.
johng
CCCUK Member
Afraid I'm not familiar with the Innovate LC-1, do you have to use a laptop with it? My sensor plugs into a gauge so I can read the AFR whilst driving along, it can also output to a laptop but I've not bothered with that. Your gauges look a bit more professional than my one, but then I'm not going to leave it there once I'm happy that my mixture is good and it's stable.
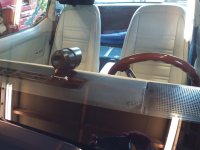

Afraid I'm not familiar with the Innovate LC-1, do you have to use a laptop with it? My sensor plugs into a gauge so I can read the AFR whilst driving along, it can also output to a laptop but I've not bothered with that. Your gauges look a bit more professional than my one, but then I'm not going to leave it there once I'm happy that my mixture is good and it's stable.
View attachment 28454
Yes it works with a laptop. if i can get a good A pillar pod for them that mite work for me. I havnt looked yet as thats the last thing i need to do.
And a bit more done tonight, its all i did. I had to try this idea out i had the other day to get the coils back in.
I got these standard coils and they are about 70mm shorter than the old one. New ones being Linear type and the old are progressive. It may matter but its a lot i thought at 70mm.

If i need to get longer ones atleast i can do it now. and its easy to get new ones in.
This is the stance before the rebuild. So sat high. Not the best side on pic, i am thinking though the new liners coils with compress less so not loose so much height ????

So i used a ratchet strap to pull the arms together to g the ball joints in place.


I got these standard coils and they are about 70mm shorter than the old one. New ones being Linear type and the old are progressive. It may matter but its a lot i thought at 70mm.
If i need to get longer ones atleast i can do it now. and its easy to get new ones in.
This is the stance before the rebuild. So sat high. Not the best side on pic, i am thinking though the new liners coils with compress less so not loose so much height ????
So i used a ratchet strap to pull the arms together to g the ball joints in place.
At last front end is near done. Just wating for another caliper kit and then the callipers can go ack on.
Ill be rebuilding the rear calipers also soon. A mate has borrowwed the g box cross member so while he has that i am cleaning up the selector. free it up a bit more.


Came apart easy enough but for the reverse spring screw, had to get abit of heat on it and slot the head as it rounded off. I am sure i have one lying about to replace it.

That lot is soaking in degreaser untill tomoz as then ill stick it in the blast cabinet.
Yesterday i made a new front cross brake line. and tonight made the D/S line. Its not clipped back yet and needs a tidy but its done.

This is why i made new lines, the dam things never come of nice for me. reason many yeas ago ii bought a flaring tool. its been well used i can tell you.


I got a back of 3/8 24 for 3/16 pipe of ebay and i had the brain line already from many hears ago. Again always save stuff you may never need.

Had few attempts to get these right so they are the same once compressed as the priginal.,


This has been bugging me so i removed it while i did the cross member. Its in good nick so i should keep it hat way and removed it. cleaned back with a coule wire wheels and painted ready to go back in once the engine is put back in.
On removal i snapped a couple of bolts, one being the bean can support.
I will be making and adaptor to go ont he end to join the rad frame support.


Not sur eif i have said but the hubs/discs are back on now, and then i found i forgot to add these shims
guess ill have to remove the hubs again and redo them, no big deal though.

So still waiting for the head bolts to arrive and clutch, should be here next week then i can crack on with the engine, reckon ill do that xmas still though, ill see, sooner the better.. In the mean time ill have this back on the floor soon a si get the cross member back, clean that up and refit.
Ill be rebuilding the rear calipers also soon. A mate has borrowwed the g box cross member so while he has that i am cleaning up the selector. free it up a bit more.


Came apart easy enough but for the reverse spring screw, had to get abit of heat on it and slot the head as it rounded off. I am sure i have one lying about to replace it.

That lot is soaking in degreaser untill tomoz as then ill stick it in the blast cabinet.
Yesterday i made a new front cross brake line. and tonight made the D/S line. Its not clipped back yet and needs a tidy but its done.

This is why i made new lines, the dam things never come of nice for me. reason many yeas ago ii bought a flaring tool. its been well used i can tell you.


I got a back of 3/8 24 for 3/16 pipe of ebay and i had the brain line already from many hears ago. Again always save stuff you may never need.

Had few attempts to get these right so they are the same once compressed as the priginal.,


This has been bugging me so i removed it while i did the cross member. Its in good nick so i should keep it hat way and removed it. cleaned back with a coule wire wheels and painted ready to go back in once the engine is put back in.
On removal i snapped a couple of bolts, one being the bean can support.
I will be making and adaptor to go ont he end to join the rad frame support.


Not sur eif i have said but the hubs/discs are back on now, and then i found i forgot to add these shims
guess ill have to remove the hubs again and redo them, no big deal though.

So still waiting for the head bolts to arrive and clutch, should be here next week then i can crack on with the engine, reckon ill do that xmas still though, ill see, sooner the better.. In the mean time ill have this back on the floor soon a si get the cross member back, clean that up and refit.
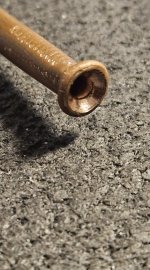
I am a little surprised nobody has spotted the wrong brake line flare
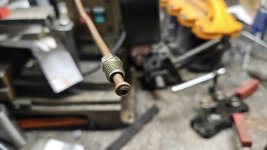
A double is how it should be, although i was told a Bubble was better by a classic car fettler. I thought best bet to go for how it should be.
Not done a great deal as got stuff going on but this is keeping my sanity at the minute.
Just been faffing doing the gear selector and cross member.
It was a bloody fiddle to get it back together, so glad i took lots of pictures as my patience was running out.
If i can ill have the cross member refitted and get it back on its wheels this week. I am still waiting for a delivery. well its been delivered to work. I hasve got some of this for it. i was going to to DIY plate the linkages but dont want to take the expence and time.
Apparently good stuff. never seen it before but a few folk have suggested it for this job aswell.
Pardon our interruption...
Last week i got to finihsh of the brake lines, well just clamped them in place. And then fit the calipers. Which i forgot to paint the break pad pins. So a quick slap of paint and dry them fast. sove fired up and hair drier to set the paint

And were done
I just had to torq up the pivot arm and enjoy

so from this


To this


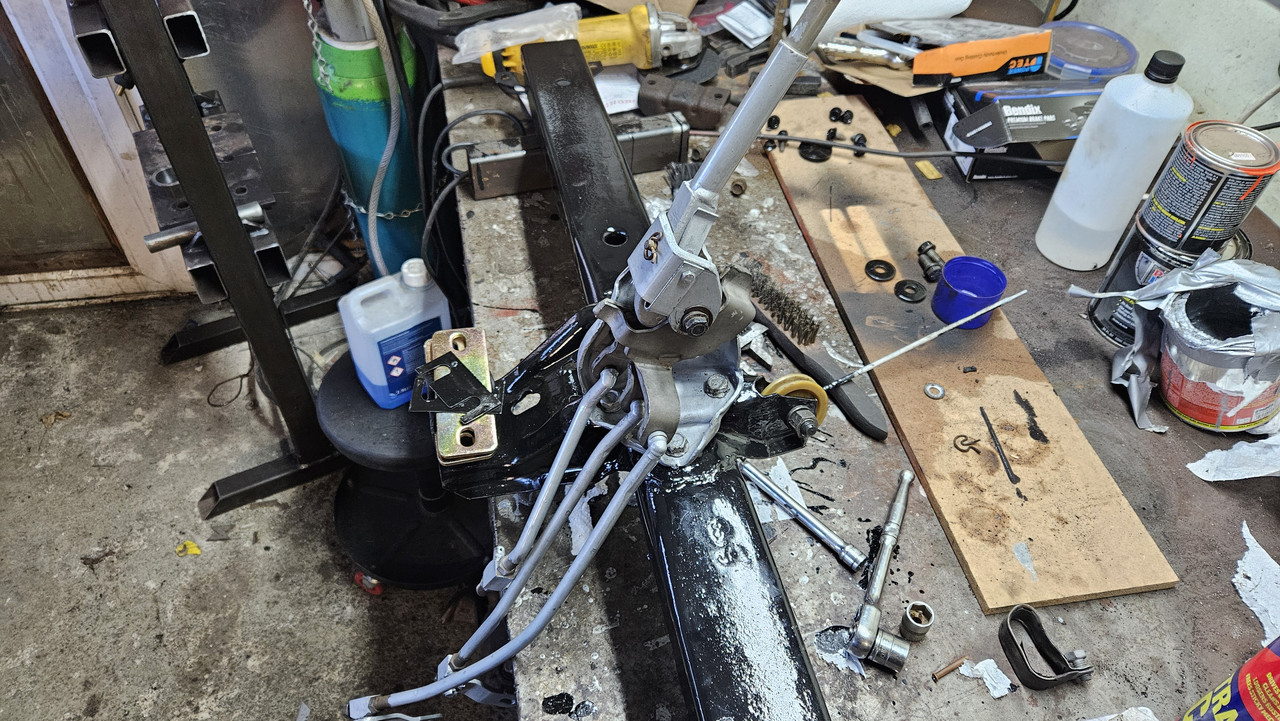

As you can see i have painted some parts with the POR15,. the rest i have left as they are a slide fit so paint will just ware and jam it a bit so the Fluid Film will work a treat for the rest.
And today i needed a destress and thoguht why not polisha wheek up fully. Came out good actually.


Near mirror finish

Could be better but its no show car and a daily as and when i can use it.
Just cant wait to get it back on the ground. Next is engine. having a nightmare sorting and finding all the bolts i need as it seems a lot are missing so i have ordered a full bolt set for the engine, all i need is the ancillary bolts.

A double is how it should be, although i was told a Bubble was better by a classic car fettler. I thought best bet to go for how it should be.

Not done a great deal as got stuff going on but this is keeping my sanity at the minute.
Just been faffing doing the gear selector and cross member.
It was a bloody fiddle to get it back together, so glad i took lots of pictures as my patience was running out.
If i can ill have the cross member refitted and get it back on its wheels this week. I am still waiting for a delivery. well its been delivered to work. I hasve got some of this for it. i was going to to DIY plate the linkages but dont want to take the expence and time.
Apparently good stuff. never seen it before but a few folk have suggested it for this job aswell.
Pardon our interruption...
Last week i got to finihsh of the brake lines, well just clamped them in place. And then fit the calipers. Which i forgot to paint the break pad pins. So a quick slap of paint and dry them fast. sove fired up and hair drier to set the paint

And were done
I just had to torq up the pivot arm and enjoy

so from this


To this


As you can see i have painted some parts with the POR15,. the rest i have left as they are a slide fit so paint will just ware and jam it a bit so the Fluid Film will work a treat for the rest.
And today i needed a destress and thoguht why not polisha wheek up fully. Came out good actually.


Near mirror finish

Could be better but its no show car and a daily as and when i can use it.
Just cant wait to get it back on the ground. Next is engine. having a nightmare sorting and finding all the bolts i need as it seems a lot are missing so i have ordered a full bolt set for the engine, all i need is the ancillary bolts.
Forrest Gump
CCCUK regional rep
A huge improvement. Good job Waynio 

I didn’t realise the later manual C3‘s had a removable crossmember. On earlier years it was only auto cars that were manufactured with a removable one.
I didn’t realise the later manual C3‘s had a removable crossmember. On earlier years it was only auto cars that were manufactured with a removable one.
Thats what i thought. Odd one. A mate has a 79 he is working on and was struggling to find a cross memeber to fit his manual chassisA huge improvement. Good job Waynio
I didn’t realise the later manual C3‘s had a removable crossmember. On earlier years it was only auto cars that were manufactured with a removable one.
Mine fits.

